hazelnut cheesecake

hazelnut cheesecake

I have to think about this one for a second. Should I do this?

Yes, I think I should.

hazelnut cheesecake

Okay here it goes. I recently read an article somewhere which stated that food bloggers are multitalented…Not only do they possess knowledge about baking/cooking, but they are also adequate writers and photographers, at least that’s what is expected from them and those are the qualities they should possess in order to be successful in the field.

hazelnut cheesecake

Well, to me writing is the trickiest of the three qualities, and I’m not talking about proper grammar usage or correct verb conjugation. I’m talking about trying to transmit my thoughts fully and properly with words. I have never been a person of many words, especially spoken words. An introvert like me, would rather express herself in other ways. But as I read over some of my posts, I have to admit that I have frequently and conveniently mistaken this blog for a diary, where I’m permitted to ramble on and on and then shyly hit the “publish” button. That doesn’t mean I’m a great writer. That just means that I happened to find the correct words in that specific time and place to express a certain feeling or thought. And thank God I did.

hazelnut cheesecake

Well, today, as I think about these cheesecakes I made, a bundle of emotion is stirred up inside of me and I might have to “let it all come out” and come clean once again…through words.

hazelnut cheesecake

hazelnut cheesecake

Here is the story. I made hazelnut cheesecakes today. I made one set for Periphery and one for me. Incase you didn’t know, Periphery is a progressive metal band that is doing really wonderful things in music.They just left for an Australian tour and I made them these treats before they left on their journey.

hazelnut cheesecake

About a year and half ago my other half, Mark, was offered the position of becoming one of Periphery’s full-time guitarists. He was offered the opportunity of a life time…of his life time. At the time, I was almost convinced that this opportunity, as rewarding as it may have been for him, did not match with what I had in mind for us. To keep things brief, after having been with Mark for many many years, I deeply believed that this sudden change of pace and life style in our lives would be a problem. I was stuck in the notion that the idea of the two (the band/touring and me) could not coexist. I was stubborn and pushed away. This would either make us or break us.

hazelnut cheesecake

Luckily we are still one, stronger than ever. It took some adjusting and getting used to, but after some compromise and care from both sides, we got over the unexpected bump on the road and swerved back to our path. After testing the waters and giving it a try, I realized that this situation is not that bad. I won’t bother listing the pros and cons. He is doing what he loves and that is very important.

hazelnut cheesecake

hazelnut cheesecake

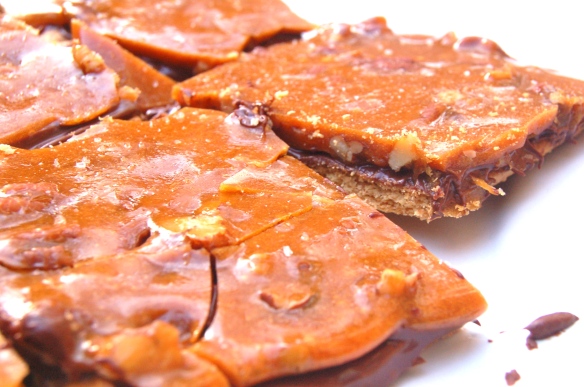
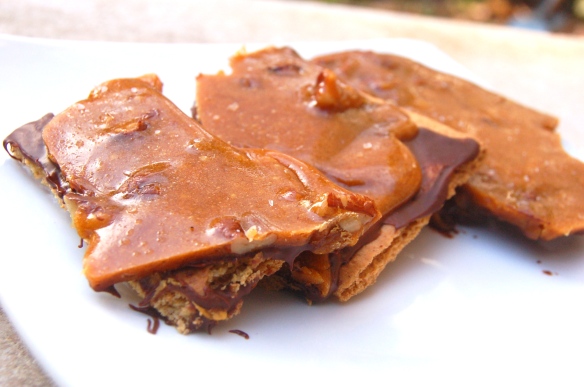
So today, I made two sets of cheesecakes: one for me and one for Periphery to take on their trip. Mine has chopped and toasted hazelnuts along with striped dark chocolate on the top. Theirs has the band’s logo on the surface of each individual piece. Mine is a larger and thicker piece (I know, I know), while theirs are smaller and thinner mini cheesecakes, to the point where they almost resemble cheesecake cookies…Cheesecake and cookies united as one?! Simply delicious.

hazelnut cheesecake

hazelnut cheesecake

They are both different, but still alike, since the same batter, method, and care, were taken to elaborate both. After all, we can all coexist peacefully.

hazelnut cheesecakes

And even better? The guys enjoyed their treats quite a bit and as you probably figure, few things in the world gratify me more than to bring happiness to others through sweets. I hope you find them to be just as tasty.

hazelnut cheesecake

• Yield: Six mini cheesecakes and one 6″ x 2″ medium-sized cheesecakes. However, the yield varies depending on what size pan you prefer to use. I’m sure you can probably get two 8″ cheesecakes out of this. Freeze for 3-4 weeks well wrapped. Keep in fridge for about 2 days.

• Note: I used tart pans for the mini cheesecakes. I know you may be thinking, “Tart pans are meant to be used to bake tarts, not cheesecakes! Duuuh!” And you are so right. However, that’s what I had in hand and I made it work just fine. Since the material of the cake pans is so thin, the baking time decreases significantly because the heat reaches the batter sooner and with more force. If using a spring form pan, be sure to wrap the bottom and sides of cake pan with aluminum foil to prevent leakage. 

ingredients for hazelnut cookie crust:

4 oz butter

2 oz sugar

3.5 oz AP flour

1/4 tsp salt

2.5 oz hazelnuts

recipe for hazelnut cookie crust:

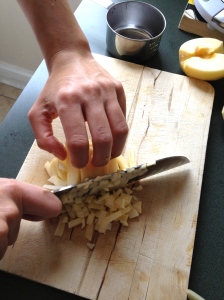
1. Place hazelnuts into a food processor and grind until hazelnuts are finely crushed. Set aside.

2. Cream butter and sugar until butter is light and fluffy.

3. Mix AP flour, ground hazelnuts, and salt together.

4. Slowly add all dry ingredients to butter/sugar mixture and mix on low speed until dough comes together.

5. Drop spoonfuls of dough two inches apart onto a sheet tray that is covered with parchment paper. You will most likely need two baking sheets to bake off all the cookies. Bake at 350 F for about 12 minutes, until cookies become golden brown. Allow cookies to cool off.

ingredients for cheesecake:

hazelnut cookies

8 oz cream cheese

4 oz sugar

6 oz Nutella

1/2 tsp vanilla

3 oz mascarpone cheese

2 eggs

1 yolk

1/4 tsp salt

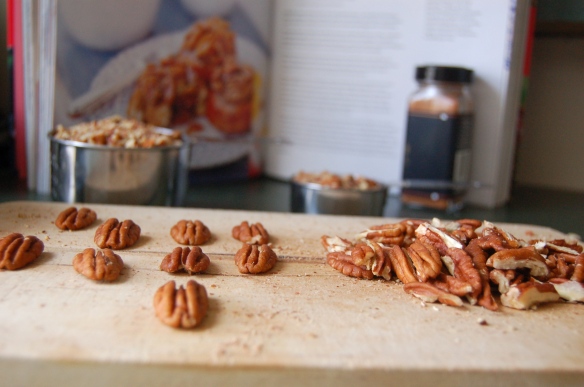
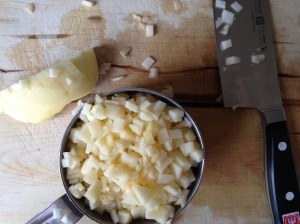
1/2 C hazelnuts, toasted and finely chopped

2 oz of dark chocolate

recipe for cheesecake:

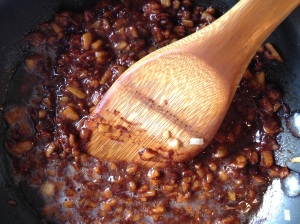
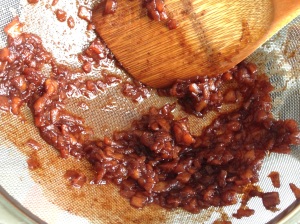
1. Grind hazelnut cookies in a food processor until cookies are finely ground. The natural oils in the hazelnut will come out when this happens, so adding melted butter is not necessary to keep the crumbs together. 

2. Grease six 3″ x 1″ tart pans and one 6″ x 2″ round cake pan
 with vegetable spray. Cut out circles that have the same circumference as the base of the pans and place each circular piece of parchment paper on the base of each pan.

3. Press grounded hazelnut cookies into prepared pans. Bake at 350 F for about 10-12, until crust becomes golden brown. Allow crust to cool off completely.

4.  Preheat oven to 275 F. Cream cream cheese and sugar on medium speed for a couple of minutes until cream cheese is light, fluffly, and smooth. There should be no solid chunks of cream cheese at this point. Add Nutella and vanilla.

IMG_4980

5. Add mascarpone cheese and continue to mix just until mixture is creamy and well combined. Scrape the sides and bottom of bowl and be sure that all ingredients are well integrated.

6.  Add yolks and eggs one at a time on low speed until batter is very smooth.

7. Strain batter into a large bowl. Ladle batter into prepared mini tart pans, until batter reaches almost to the top of each pan. Ladle remaining batter into 6″ x 2″ cake pan.

IMG_4981

8. Place mini tart pans onto a baking sheet tray. Place sheet tray into preheated oven and pour water into sheet tray, until water reaches about halfway the sides of each pan. Place 6″ x 2″ cake pan onto a separate baking pan with sides. Pour water into baking pan so that water reaches about halfway the sides of cake pan. Bake mini cheesecakes for about 20-30 minutes and larger cake for about 1 hr 20 min, until cakes jiggle in the center when tapped.

9. Cool cheesecakes completely at room temperature. Place cakes in freezer for about 1-2 hours. 

10. Turn frozen cheesecakes upside down over a flat surface that is covered with parchment paper. Torch the sides and bottom of each cake and tap firmly until cheesecakes are released. Turn cheesecakes over.

DSC_0465

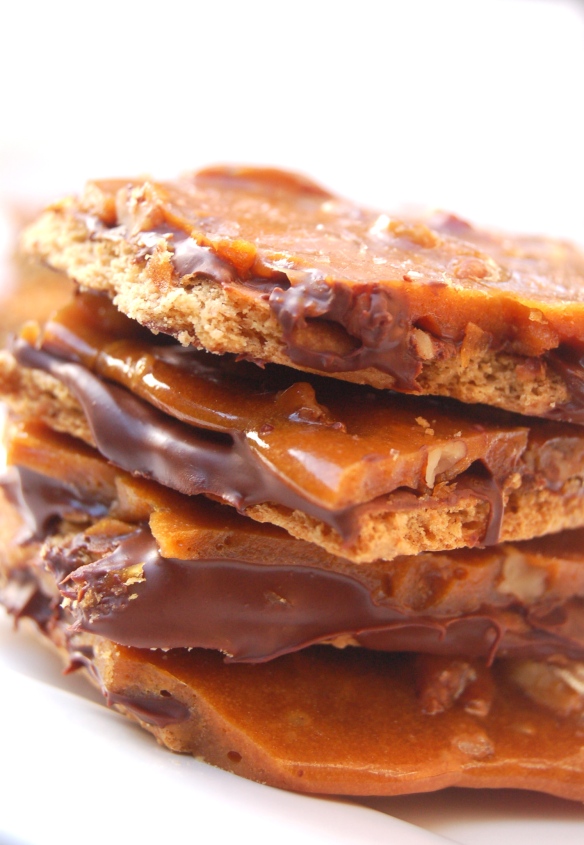
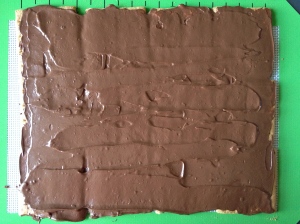
11. Time decorate your cakes…sprinkle a handful of toasted/chopped hazelnuts over the surface of each cheese cake. Place dark chocolate in a small bowl and melt over a bain-marie. Place melted dark chocolate into a pre-made paper cone. Cut the paper cone’s tip and and move swiftly and quickly back and forth over the cake to create thin lines of chocolate on its surface. If you don’t have a paper cone and don’t feel comfortable making one, you could try dipping the tip of a fork or a spoon in the melted chocolate and moving it back and forth over the cake so that chocolate drizzles over it.

hazelnut cheesecake

You can then play around some more with the chocolate…It’s fun to do so and you may have trouble containing yourself.

IMG_4985

You can also draw the logo of a progressive metal band with the chocolate, that’s just one idea for instance…

hazelnut cheesecake

Now comes the best part. Move the cheesecake onto a serving dish or platter with an offset spatula. Cut yourself a small piece or various pieces and enjoyyyyy! Be ware though, this dessert is super decadent and rich. A small piece goes a long way.

hazelnut cheesecake

fried baklava with honey cinnamon cream

DSC_0381 copy

Two words for you: Fried Baklava. I’ll let the pictures say the rest.

But really, this recipe is simple to execute and super gratifying to taste. It’s magnificently light and crispy on the outside while being decadently rich on the inside. The blend of honey, cinnamon, dates, and nut flavors will keep you coming back for more. More good news? Once the baklava are assembled, you are bound to enjoy them in a matter of seconds, as this baklava is…fried.

DSC_0343

On another note, today is February 3, 2013. For me it’s just another regular Sunday, but for  a multitude of other people, today is the Super Bowl, an event that in my opinion holds just as much power as a holiday.

DSC_0339

Over the years, I have never watched the Super Bowl. I know nothing about the sport of football. Like really….. nothing. Oh wait, I guess I do know that people tend to enjoy chips and salsa, chili, various types of dips, an assortment of precut veggies, and of course….lots and lots of booze. And then there’s the other stuff. This year for example, Beyoncé will perform during half time. And those commercials…aren’t they good? See? I know a thing or two.

DSC_0349

I have zero emotional connection to this sport, so instead of watching the Ravens and the 49ers fight over the Super Bowl trophy, I am keeping myself busy by reviewing this recipe I wrote a few days ago and bringing it to you. I hope you enjoy this as much as you may or may not enjoy the Super Bowl!

Yield: About 24 pieces. Serve immediately.

DSC_0345 copy

Ingredients for Baklava Filling:

3/4 C dates, roughly chopped

1/2 C walnuts

1/4 C pecans

1/4 tsp cinnamon

1 1/2 tsp honey

small pinch of salt

Recipe for Baklava Filling:

1. Combine all ingredients in a food processor and pulse until mixture is finely grounded and comes together to form a paste. Set aside for later use.

IMG_4737

Ingredients for Honey Cinnamon Cream:

1 C heavy cream

1/4 C honey

2 tsp cinnamon

Recipe for Honey Cinnamon Cream:

1. Combine heavy cream, honey, and cinnamon in bowl. Whisk until cream thickens and stiff peaks form. Refrigerate and set aside for later use.

Ingredients for Fried Baklava:

phyllo dough

baklava filling

egg wash

vegetable oil for deep frying

honey cinnamon cream

honey

walnuts, toasted and finely chopped

Recipe for Fried Baklava:

1. Stack three sheets of phyllo dough over a cutting board. Make 2″ marks along the bottom edge of stack. Cut vertically along each mark to create 2″ strips.

IMG_4745

2. Scoop 1/2 tsp of baklava filling. Form the filling into a ball with your hands and form the ball into a cylinder.

3. Place the cylinder at the bottom of each strip of phyllo dough.

IMG_4753

4. Lightly apply eggwash along the strip of phyllo dough with a pastry brush.

5. Roll phyllo dough over the filling and keep rolling until the dough has gone around the filling four times. Cut across the phyllo dough to separate the roll. Place roll on a dish with seam side down. Repeat steps 1-5 until all of the filling has been used.

IMG_4756IMG_4752IMG_4759

6. Heat up vegetable oil in a small sauce pan over low-medium heat and fry until golden brown. This happens fairly quickly, about 8-10 seconds.

7. Place fried baklava over a napkin to soak up excess oil.

8. Meanwhile, place honey cinnamon cream in a piping bag that has a #3 plain tip. Pipe spirals of cream on a serving plate. Place baklava over cream. Finish with a drizzle of honey and a sprinkle of finely chopped toasted walnuts.

IMG_4766

sticky buns

sticky buns

So what do you do when you receive a notification saying that you have won a copy of Martha Stewart’s new recipe book? Oh, a signed copy nonetheless of Martha’s American Food: A Celebration of Our Nation’s Most Treasured Dishes, from Coast to Coast.

DSC_0178

sticky buns

You may be a gullible dreamer just like I am and believe the good news momentarily without asking any questions…because when luck is on your side, sometimes it’s better to avoid asking questions. Well yes, I have won a recipe book signed by the one and only Martha Stewart, thank you very much. Of course I have. Why wouldn’t I?

No questions asked…at least for the first couple seconds.

sticky buns

Then my brain, which is practically stubborn by nature, starts to ponder the obvious questions that would run through the mind of anyone who has never ever won anything in her life. Well, that sounds negative and hopeless, doesn’t it? Let me clarify…I have won several crucial things in my life that I will never take for granted: the opportunity to be blessed with a great family, a sweet and caring soulmate, a dual citizenship, a few splendid friends, etc, etc. But that’s not what I meant.

sticky buns

What I meant is that I have never won a vacation to some island in the Caribbean. I have never won the lottery. I have never won a free movie ticket. I have never won a free cupcake. And I certainly have never won a signed book. Oh wait. Once I did win a seat exchange from second class to first class on a British Airways flight.

DSC_0193

sticky buns

So after doubting my luck and ability to actually win something and after asking “why me?,” several times, I responded to the email. Martha Stewart’s Social Media Content Director, informed me that Martha had chosen her winner of the day for sharing her recipes online and that the winner would receive a free signed book. But the story didn’t end there. He then added that he was coordinating with other book winners and would possibly do an entry on Martha’s blog on great completed projects/recipes by book winners. He suggested that I keep him informed, that I take pictures of the preparation, and most importantly…that I have fun. And that’s exactly what I did!

sticky buns

It was difficult to choose a recipe from the book and I must have bookmarked over a dozen recipes with sticky notes, but as soon as I glanced over pages 126-127, it was decided. It was basically love at first sight and these sticky buns had me at hello. I simply had to recreate these magnificent, sticky, doughy, tender, and sweet creations. After having tasted them, I can fully say that I am so thankful I did!

sticky buns

I hope you enjoy them as much as I did…but I’m pretty certain you will. I mean look at those beauties…how could you not?

sticky buns

*Yield: 12*

Backstory: Eating a freshly baked sticky bun is a hands-on experience, whether you prefer to bite into it whole or peel apart the gooey spiral and eat one piece at a time. The sugary treat, now standard fare in coffee shops and malls nationwide, comes to us via the Pennsylvania Dutch, who are famous for their sweet yeasted breads and other pastries. Today, you can visit Pennsylvania’s Lancaster County to sample authentic Amish sticky buns—or use this recipe, chock-full of brown sugar, cinnamon, and pecans, to bake your own.

sticky buns

Ingredients:

2 packages active dry yeast (each 1 scant tablespoon)

1 cup plus 2 tablespoons warm milk (about 110 F)

6 cups all-purpose flour

1/3 cup granulated sugar

2 teaspoons salt

4 large eggs

1 pound (4 sticks) unsalted buter, cut into small pieces and softened, plus more for pan

3 1/3 cups pecans (about 14 ounces)

2 1/4 cups light corn syrup

1 1/4 cups packed light-brown sugar

1 1/2 cups plus 3 tablespoons sour cream

1 tablespoon ground cinnamon

Recipe:

1. Sprinkle yeast over the milk; stir to dissolve yeast. Let stand until foamy, about 10 minutes. With an electric mixer on low speed, beat flour, granulated sugar, and salt to combine. Mix in yeast mixture and eggs until combined.

sticky buns

2. Increase speed to high and add the butter, several pieces at a time; continue mixing the dough until it is smooth and shiny, 8 to 10 minutes. Transfer to a parchment-lined 13-by-18-inch baking pan; use your hands to spread dough to fit the pan. Cover with plastic wrap and refrigerate up to overnight.

sticky buns

sticky buns

3. Preheat oven to 350 F. Generously butter a standar 12-cup muffin tin. Chop 2 cups pecans; break the remaining 1 1/3 cups pecans in half lengthwise. Pour 3 tablespoons corn syrup into each prepared cup; top with about 1 tablespoon brown sugar and 2 tablespoons halved pecans.

sticky buns

sticky buns

sticky buns

sticky buns

sticky buns

4. Remove dough from refrigerator and let stand at room temperature until slightly softened, about 15 minutes. Roll out dough lengthwise to form a 15-by-20 inch rectangle about 1/4 inch thick. Using a spatula, spread sour cream evenly over dough, leaving a 1/2-inch border all around. Dust sour cream with cinnamon and sprinkle with 2/3 cup brown sugar. Top evenly with chopped pecans and roll the dough up lengthwise to form a log, about 3 inches in diameter. Trim ends so log is 18 inches.

sticky buns

sticky buns

5. Using a sharp knife, slice log into 1 1/2-inch-thick rounds. Place one in each prepared cup. Cover with plastic wrap and let rise in a warm place until dough is 1/2 inch above cups, 20-30 minutes. Transfer to oven, placing a baking sheet on the rack below to catch any drips. Bake, rotating tins halfway through, until dark golden brown, about 40 minutes. Remove from oven, and immediately turn out buns onto a parchment-lined baking sheet. Replace any pecans that may have fallen off. Let cool on a wire rack before serving; best enjoyed the same day.

sticky buns

sticky buns

sticky buns

Recipe and recipe backstory is courtesy of Martha’s American Food: A Celebration of Our Nation’s Most Treasure Dishes, From Coast to Coast.

sticky bunssticky buns

sweet lemon almond smoothie • sooth your throat

sweet-lab

This is probably not what you had in mind. It’s not what I had in mind either.

We are amid holiday spirit and Christmas cheer, so why in the hell is this recipe not one that showcases cookies, ginger spice bread, or other holiday favorites? Well, I also wasn’t expecting to resort to a smoothie today and I much rather create a recipe for say a pumpkin roulade, a chocolate peppermint cake, or an eggnog whatever. Never mind. Scratch the last example. I don’t particularly enjoy eggnog.

sweet-lab

Anyways, those are the sort of recipes that are to be expected in mid-December, right? I mean every food blogger out there is presenting favorite holiday recipes and what do I have to offer? A smoothie! But it is what it is and I am completely okay with that. One should never underestimate the power of a smoothie, especially when it can help sooth your sore throat. To be fair, I have also had the opportunity to make crunchy nutty choco toffee, cookies, peppermint truffles, and other holiday treats. Plus, the holidays are no way near over and there is still time to make traditional or new holiday sweets. So I am not complaining at all (even if my tone suggests otherwise).

sweet lemon almond smoothie

I have been feeling a little under the weather during these past few days and this smoothie has done magical things to heal the pain and scratchiness in my throat. If I had to compare my voice to that of any known figure you would know, it would have to be to the exorcist girl. Let it be known that I do not have the ability to spin my head 360 degrees around my own torso and I do not possess the talent of vomiting green junk when I am feeling irritated or furious. That would be insanely insane though. But my voice…oh yes, the sound of my voice in these past few days could be used in the next exorcism movie,…because we all know there will be plenty more of those coming out in the near future.

Going back to what’s important. This smoothie contains ingredients that will help alleviate a soar throat. Lemon contains high levels of vitamin C and natural antibacterial/antiviral agents. Almonds and honey are natural pain killers that will relieve the inflammation. Apple is one of those fruits that will help ease lung and throat irritation all year round and add smoothness and fullness to the smoothie. The boost of vitamins and combination of healing ingredients do not compromise good flavor. Not at all! This smoothie is delicious with a dominating sweet honey and almond flavor and a spark of refreshing fresh lemon juice. That sore throat will stand no chance of winning once it meets this sweet lemon almond smoothie!

sweet-lab

* Yields about 1 1/4 C. *

Ingredients:

6 fl oz almond milk

1/4 C raw almonds

1/4 C Gala apples–peeled, cored, chopped

1.5 fl oz lemon juice (=3 T of lemon juice)

2 T honey

Recipe/Procedure:

1. Combine almond milk, raw almonds, apple, lemon juice, and honey into a blender. Blend until fruit and almonds are completely pureed. Serve immediately.

crunchy nutty choco toffee

sweet-lab

sweet-lab

I love FaceTime. Thank you Steve Jobs for making your Apple/Mac products so…just so damn good.

sweet-lab

sweet-lab

Because of FaceTime I get to see my 6-month-old niece who lives in Austin chew her sock and smile at my feeble attempt to make her giggle. Hearing her giggle is the best sound in this world by the way.

sweet-lab

sweet-lab

Because of FaceTime I get to see Mark when he’s away on tour with his band Periphery. “So where in Europe are you today again? Oh, Prague, of course. How beautiful. I wish I was there too.”

sweet-lab

sweet-lab

And because of FaceTime I get to see my wonderful mother who lives in Spain. I always tell her that I love her and that I can’t wait to see her. And then she’ll say, “I know. I can’t wait to hold you, but isn’t it great that we can at least see each other so often through FaceTime?” Yes, it is mom.

sweet-lab

sweet-lab

Yesterday I was in the middle of making this recipe when mom called me on FaceTime. I pretended I had everything under control, but I still had to get my mise en place in order so that everything was ready to be added to the toffee when it reached the correct temperature.

sweet-lab

sweet-lab

sweet-lab

sweet-lab

However, I knew I didn’t have the situation completely under control: the sugar was already cooking and the butter still had to be cubed, the pecans still needed to be chopped, the baking soda and vanilla had to be measured out, the candy thermometer had to be placed on the side of the pot, a few recipe adjustments had to be marked down on my recipe book before they evaporated from my memory, etc. But when mom calls, everything can wait.

sweet-lab

sweet-lab

“What are you doing? You seem busy…” she stated (in Spanish, of course) as she heard the clanking of pans and sheet trays and saw how I turned my back on her a few times to check what was going on in the stove. I told her that I was in the middle of making toffee. “I can call back later or we can just talk tomorrow…”

“No! It’s okay. I can multitask!”

sweet-lab

sweet-lab

I told her a few things about my day. She told me a few things about hers. And through it all, I managed to show her how to finish the recipe. “Oh shit! Hold on mom! The sugar has reached 305 F and I have to add a few things to it before I pour it….”

“Really, we can talk at another time if you want to. You seem like you have a lot going on…Mmmmmmm…that looks delicious,” she stated as I poured the toffee over the chocolate and graham crackers.

sweet-lab

sweet-lab

And just like that, I got to feel extremely close to my mom. I always, always do, no matter how physically apart we are. But that moment was pretty special and magical. I never thought I would be able to share a such a spontaneous moment that involved doing something I love with all my heart (cooking/baking) with a person I love with all my heart while being thousands of miles away. I guess I’m just extremely thankful for it. That’s it.

Oh yeah, and I’m also very thankful for these delicious crunchy nutty choco toffee treats!

sweet-lab

sweet-lab

Ingredients:

12 graham crackers (or 24 if they’re cut down the perforated line–as long as the dimensions of the rectangle you build is about 7.5″ x 9″).

3/4 C dark chocolate chips

8 oz sugar

2 oz water

2 oz honey

6.5 oz butter

1 tsp vanilla

1/4 tsp baking soda

3/4 C pecans

sea salt

*Yield: Anywhere from 12-24 pieces, depending on how you cut/break up the toffee. Cover toffee in plastic wrap and store in an airtight container for up to two weeks.*

Note: There will be additional toffee left over after pouring it over chocolate/graham crackers. I simply poured the extra toffee over another silpat or a greased baking sheet to have extra toffee at hand. If you don’t want to have extra toffee, cut the recipe for the actual toffee in half. Keep the same amount of graham crackers and chocolate chips.

Recipe/Procedure:

1. Preheat oven to 350 degrees F. Cover cookie sheet with parchment paper or a nonstick silicon baking mat (ie: silpat).

2. Place graham crackers on parchment paper or on silpat in rows and of 4 x 3 to end up with the dimensions of 9″ x 7.5″

3. Sprinkle chocolate chips evenly over graham crackers and bake for about 10 minutes, until chocolate softens and becomes spreadable.

IMG_3930

4. Remove cookie sheet from oven and gently spread the melted chocolate chips over graham crackers with an offset spatula, trying your best to not knock the graham crackers out of place. The melted chocolate should cover entire surface of graham crackers. Refrigerate so that chocolate cools down and firms up.

IMG_3933

5. Meanwhile, toast pecans at 325 F until they toasted all throughout. Allow pecans to cool. Roughly chop pecans and set them aside for later use.

6. Cook sugar and water over medium heat and add honey when sugar and water mixture looses its murky appearance and it becomes clear, after about a minute or so.

7. Add butter and continue cooking until it reaches a temperature of 300 F–305 F (hard crack stage).

8. Remove from heat and add vanilla, baking soda, and toasted pecans. Stir and pour mixture over the prepared chocolate and graham crackers. Spread toffee gently over chocolate/graham crackers so that it reaches every edge and corner of the rectangle. Allow toffee to completely cool before cutting/breaking it up in pieces. Sprinkle sea salt over toffee. Enjoy!

IMG_3934

apple cinnamon ice cream • it’s your life

sweet-lab

sweet-lab

So what if it’s December and you feel like making ice cream? I say you do it.

And so what if the act of making a frozen treat when it’s really chilly outside doesn’t make sense to others?

Does it make sense to you? Great, then that’s what matters.

As I have been told lately by various close friends, do whatever you want to do. I’ve been instructed to be more selfish as horrible as that may sound and to stop constantly thinking of what others may think. Of course, this advice does come with a bit of structure and guidelines: do whatever you please, as long as you’re respectful and you don’t harm others along the way.

But that’s exactly where the situation can become quite tricky. For example, would it cause harm to those who are close to me if I were to stop everything and go on a long journey to God knows where? Would they understand my current “lack of direction” and disinterest to do what’s considered “appropriate” for my career and life? I don’t know. Their confusion and possible state of disapproval may seek stop me. But it shouldn’t in the end.

sweet-lab

sweet-lab

“You only have one life and one chance,” were words that were directed to me just last night by someone close to me. I’m aware that it would be foolish to live the only chance we get at life to the standards of others, even if those people love you and want the best for you. The pressure of doing what’s “correct” in the eyes of others may be there, but only one can make the stress and tension disappear on his/her own.

sweet-lab

sweet-lab

It should be simple to do whatever we feel like having the urge of doing. It should feel easy, natural, and free to do so…but it doesn’t, at least not for me. If you’re like me, you may think twice, three times, and plenty of times more of how you should be living life. Because inside your head you always wonder if your next move will be “proper” or “suitable” in the eyes of those who are close to you. And if you’re like me, you may hear their voices in your mind commenting on your unexpected next move…”what are you thinking? Really, you’re not going to work there anymore? Why? Where are you going and why? I think it would be better if…”

It shouldn’t be that way.

No more.

sweet-lab

sweet-lab

So somehow, you just have to find the courage inside of you to make your voice stronger than theirs. And somehow, amid all the distracting noise, you have to make it your mission to listen deeply to what your voice is telling you. Because again, in the words of Bon Jovi, “It’s my life. And it’s now or never.” Oh Jon Bon Jovi…you wise, wise, man.

I do think it’s very important to acknowledge the opinions of those who care about you, but it’s just as important to learn how to tone down their voices in your mind to be able to hear your own to make your own decisions. Live your life respectfully and to the fullest (however that may be). I’m still trying to figure it out myself.

And of course, enjoy this apple cinnamon ice cream with pecans and caramel only and only if you would like to and find that it is “appropriate” for you. I know that it was for me.

sweet-lab

sweet-lab

**Yields about 2-2.5 C. Store base in fridge for 3-4 days and 2-3 days in freezer as ice cream.**

Ingredients:

8 oz milk

8 oz cream

2 cinnamon sticks

4 oz yolks

2 oz dark brown sugar

2 oz granulated sugar

1/2 tsp vanilla

2 oz sparkling apple cider (or 4 Tablespoons) and additional 1 C for cooking apples

2 T dark brown sugar

1 T cinnamon

1 C apples (about 1 apple)–peeled, cored, and fine diced

3.5 oz caramel sauce (or 1/3 Cup), click here to view recipe for caramel sauce.

1/2 C pecans

Recipe/Procedure:

1. Add milk and cream to a pot and bring to a gentle simmer.

2. Drop cinnamon sticks into pot to steep them while milk and cream heats up. Turn off heat when milk and cream come to a simmer. Take pot off heat and cover it. Allow to steep for about 30 minutes. (Note: Steeping time varies in the desired intensity of the flavor).

3. Drain the half and half and re-measure the liquid before continuing with recipe. If the weight has decreased, add milk to bring up to the same quantity you started with (orginal amount=16 oz of dairy). Return pot to the stove and bring milk/cream mixture and cinnamon sticks to a simmer once more.

4. Meanwhile, whisk egg yolks, dark brown sugar, and granulated sugar in a bowl. When milk and cream have come to a simmer, temper the eggs with the milk and cream while whisking simultaneously. Allow mixture to rest for a few seconds so that the sugar can dissolve with the heat.

5. Pour mixture back into pan and stir in a figure 8 pattern so that every spot of the pot is touched as you cook it. Be sure to cook on low and gentle heat so that eggs don’t become scrambled. Cook and continue stirring until milk/cream naps the back of a spoon. That occurs when the sauce in your saucepan is thick enough to stick to your spatula; and therefore indicates that your mixture is ready.

IMG_3826

6. Pass cream through a sieve to remove the chalazae of the eggs and cinnamon sticks. Pour crème anglaise into a large bowl that is sitting over ice and add 2 oz apple cider and stir. Refrigerate until further use.

7. Prep apples. Peel, core, and finely dice apples.

IMG_3827

IMG_3828

IMG_3829

IMG_3833

8. Combine diced apples, ground cinnamon, and the 2 tablespoons of dark brown sugar in a pan and cook on low-medium heat until apples start to break down, about 7 minutes. Pour sparkling apple cider to deglaze pan and continue cooking until apples become soft and tender. This process can take a while and as soon as the sparkling apple cider evaporates, pour more into pan and just continue pouring and cooking apples until apples break down and are tender. It took me about 30-40 minutes of deglazing and cooking apples to soften them up completely. You may need more than 1 cup of sparkling cider. It’s important to cook apples so that the water that is contained in the fruit is expelled. If water remains in the apples, the fruit will become icy when frozen. Drain cooked apples to remove excess liquid.

IMG_3836

IMG_3838

IMG_3841

9. Toast pecans at 325 F until they toasted all throughout. Allow pecans to cool. Roughly chop pecans. Set aside for later use.

10. Remove crème anglaise from refrigerator and pour into ice cream machine bowl. Make ice cream according to the manufacturer’s instructions.

IMG_3845

Be sure to have ice cream fold-ins (caramel sauce, toasted pecans, and cooked apples) at hand to be ready to fold into ice cream after spinning/churning cycle is complete. Freeze ice cream until you’re ready to enjoy it.

pear upside down cake • room for improvement

sweet-lab

Is Thanksgiving over yet?

I tend to live in my own little world and sometimes become oblivious to things happening around me. But yeah, the cut pieces of aluminum foil covering numerous trays of leftovers in the fridge and the crumbs of pie crust scattered on the kitchen counter are enough to remind me that this day of complete and utter gluttony has passed, as is the occasional tendency to burst out of my jeans.

sweet-lab

Last Thanksgiving I made a pear upside down cake. I got the recipe from some well-known gourmet food magazine that I don’t remember the name of. Okay, that last part is not true. Of course I remember the name of the magazine. I only read it like every day of my life. The cake was okay…but okay is simply not good enough.

sweet-lab

“Okay” means that there is room for improvement. You know…like when you got that B+ on a spelling test in third grade. Didn’t that just make you want to strive for an A+ ? Or maybe you were such a perfect speller that this is a weak argument because it simply does not apply to you. Well, hopefully you get my point anyways.

sweet-lab

Improvement through repetition is a good thing and so I decided to try things a little different and come up with a recipe for a pear upside down cake of my own. I changed the recipe of the actual cake. This one also uses a clear caramel along with streusel that is layered in the batter to make it all even a little better…because you know, there is always room for improvement.

**Yields one 8″ cake. Store baked at room temperature for 1 day well-wrapped. Store fully baked and frozen for 30 days.**

Ingredients for Streusel:

3 oz brown sugar

1/2 C walnuts, chopped

1 T cinnamon

1/4 C pears, finely diced

Recipe/Procedure for Streusel:

1. Peel, half, and core pears. Place halved pear flat on a work surface and cut across three times horizontally, leaving 1/4″ distance from each slit. Make vertical cuts across the surface of the pear, leaving 1/4″ distance from each vertical cut. Begin cutting perpendicular to the slices made in the previous step to end up with small dices of pear.

2. Mix brown sugar, walnuts and cinnamon together by hand until all ingredients are well combined.

3. Toss pears into mixture and combine well. Set aside for later use.

Ingredients for Pear Upside Down Cake:

5 oz cake flour

3 oz AP flour

1 tsp baking powder

1/4 tsp baking soda

1 tsp salt

6 oz granulated sugar

4 oz brown sugar

4 oz butter

4 oz eggs

1 tsp vanilla extract

4 oz milk

4 oz buttermilk

2 medium bosc pears

Recipe/Procedure for Pear Upside Down Cake:

1. Combine cake flour, AP flour, baking powder, baking soda, and salt together and sift them into a large bowl. Set aside.

2. Cream butter, granulated sugar, and brown sugar on medium speed until mixture is cohesive, light, and fluffy.

3. Add eggs, one at a time. Scrape down sides of bowl once eggs have been incorporated. Add vanilla and continue mixing.

4. Switch speed on mixer to low. Add about 1/3 of dry ingredients into butter/sugar/egg mixture until batter takes the dry ingredients.

5. Combine milk and buttermilk together and add until it begins to incorporate. Repeat additions of dry and wet until all ingredients are fully incorporated into batter, being sure to end with an addition of dry ingredients. Set aside for later use.

6. Butter an 8″ diameter round cake pan and line bottom with parchment-paper round.

7. Peel, halve, and core pears. Cut pears lengthwise into 1/4″ slices. Set aside for later use while making clear caramel.

Ingredients for Clear Caramel:

4 oz granulated sugar

2 oz water

Recipe/Procedure for Clear Caramel:

1. Combine water and sugar in a pot. Remove lumps in sugar with fingers.

2. Bring water and sugar to caramel stage (sugar must reach a uniform golden brown (dark amber color). Remove from pan.

Assemble and Bake:

1. Pour clear caramel into prepared cake pan and swirl pan to coat round of parchment.

2. Layer slices of pear over caramel, overlapping them all around.

3. Place one-third of the batter on the bottom of pan. Sprinkle streusel mix over batter. Repeat layering of streusel and batter until both are used.

4. Bake at 350 F for about 40-45 minutes, until a toothpick that has been inserted in the center comes out clean.

maple pumpkin mini-muffins…and doughnuts • decisions, decisions

sweet-lab

Please excuse me if I sometimes mistake this blog for a diary.

A diary? Yes, a diary. And don’t act like you haven’t done that before.

sweet-lab

So here it goes. I may be the most indecisive person I know. People have called me out on that in the past. People who are close to me actually. “Wow, you’re a pretty indecisive person,” they may suggest…Reaaaaaally? Hmmm…I really didn’t know that and I thank you so very much for pointing that out to me…because really, after twenty-something years of living in this body and having this same brain, I still hadn’t figured that one out on my own. So yes, thank you once again for enlightening me with such an amazing self-discovery.

sweet-lab

In a less sarcastic tone and more of a realistic one, when that occurs I am driven to either congratulate the person for pointing out such a correct character trait and/or to smack them across the face.

Oh my! I’m sorry. Did I say that aloud? I’m really not that violent at all!

sweet-lab

I just bottle up emotions sometimes and consequently rage comes out in peculiar and interesting ways. But that is a different issue. Thankfully I have a diary blog to vent and share recipes while I do so. It’s simply a great deal.

Anyways, I am indecisive sometimes. I know that. I own that.

sweet-lab

sweet-lab

When asked what my favorite color is, I say blue, then choose green, then go back to blue. But now it is all clear. My favorite color is violet. Yes, violet.

sweet-lab

By the way, do adults really still ask each other what their favorite color is? I’m pretty sure that stops happening somewhere in our early teen years, but somehow my mind still ponders the question from time to time. I insist. My favorite color is violet.

sweet-lab

After several years of dealing with such indecision and hesitation, I have diagnosed myself and have come to the conclusion that my indecision is caused by either:

1) a lack of interest or 2) an abundance of interest

Such as….Would you rather buy this carpet with the earthy tones or this other one with the earthy tones? Well, I don’t know. They’re both pretty horrible-looking. I simply can’t decide. Actually, wait. I have made up my mind. I choose neither. Yes, neither because they’re both pretty ugly to tell you my honest opinion.

sweet-lab

Or consider these scenarios for example…Should we go out for dinner or cook something delicious at home? Hmmm…I don’t know. They both seem like favorable options to me. At this precise moment in time, I want to spend sometime in the kitchen boiling pasta until al dente, but I also feel like having that amazing strawberry cobbler from the restaurant around the corner…Give me a second…I might have to make a pros and cons list for each and get back to you with the verdict. Thank you for your time.

Or…Would you rather have a picnic or go on a long walk through D.C. and catch lunch somewhere downtown? Hmmmm…Let me think about this one in the shower. I want both. Can we do both? Well that would suggest eating lunch twice. Okay, just a second…

sweet-lab

And last but not least….I’m going to write a recipe for spicy, sweet, and tasty maple pumpkin mini-muffins…or wait…how about doughnuts? Should I make doughnuts instead? So which one is it? Maple Pumpkin Mini-Muffins or Maple Pumpkin Doughnuts?

Well, how about both?

sweet-lab

Yes, when it seems merely impossible to choose between the two, you can try what I do: take neither or take both!

So thanks to my high level of indecision, here they are: the one(s) and only Maple Pumpkin Mini-Muffins and Maple Pumpkin Doughnuts.

Enjoy your indecision every once in a while.

sweet-lab

**Yield varies depending on how many mini-muffins and baked donuts you want to bake off. My yield was 24 mini-muffins and 5 donuts. Store batter in fridge for 4-5 days or scooped and frozen for up to 30 days. Freeze fully baked for 30 days. Store baked at room temperature for 1 day.**

Ingredients for Maple Pumpkin Mini-Muffins & Doughnuts:

4 oz AP flour

4 oz cake flour

2 tsp baking powder

1 tsp salt

1 1/4 tsp cinnamon

1/4 tsp ground cloves

1/4 tsp nutmeg

3/4 tsp ginger

1/2 tsp allspice

2 oz brown sugar

6 1/2 oz pumpkin puree

3 oz milk

4 oz eggs

4 oz vegetable oil

5 oz maple syrup

1 tsp vanilla

Recipe/Procedure for Maple Pumpkin Mini-Muffins & Doughnuts:

1. Sift cake flour, AP flour, salt, baking powder, cinnamon, ground cloves, nutmeg, ginger, and allspice into a large bowl.
2. Add sugar to dry ingredients and mix well to combine.
3. In a different bowl, whisk pumpkin puree, milk, eggs, vegetable oil, vanilla, and maple syrup together.4. Combine the wet and dry mixtures together, just enough so that all ingredients are incorporated into the batter. Do not over mix. Allow batter to rest 20-40 minutes in fridge.5. Grease a mini-muffin pan and a doughnut pan with vegetable oil. Pour flour inside of each tin cup and doughnut well. Move/shake the pan around and from side to side so that the flour sticks to the vegetable oil and each space is covered in flour. This will prevent the batter from sticking to the pan while baking.6. Scoop about 1/8 C of batter into each mini-muffin tin cup so that each cup is about 3/4 full. Repeat procedure and fill the wells of the doughnut pan about 3/4 full.

7. Bake at 375 F for about 7 minutes. Turn pan around and bake for an additional 6-7 minutes or until a toothpick that has been inserted in the center tests clean.

8. Remove the doughnuts and mini-muffins from oven, and cool in pan completely. Loosen their edges with a small offset spatula and transfer them to a rack to cool.

Ingredients for Maple Icing:

1 C (or 4.75 oz) 10x sugar

2 oz maple syrup

about 1/8 C (or 1 oz) water—may adjust by adding a bit more if consistency remains thick for icing

1/4 C roasted salted pumpkin seeds, finely chopped

Recipe/Procedure for Maple Icing:

1. Mix sugar, maple syrup, and water in a small bowl. Whisk mixture until consistency is smooth.

Time to put it all together.

1. Dunk mini-muffins and doughnuts facedown into the icing so that the top of each is covered in icing. Remove excess icing by moving the mini-muffin or doughnut in a circular motion and wait for some of the icing to drip back into the bowl.

2. Place mini-muffins and doughnuts in a cooling rack or serving plate and wait for the icing to set for 2-3 minutes.

3. Sprinkle a pinch of finely chopped pumpkin seeds over icing. Allow the icing to continue to fully set.

Enjoy both!

sweet-lab


orange cream phyllo cups • making a small difference

sweet-lab.com

What do you do when you have a lot of something left over? A lot of lemon curd? A lot of chocolate mousse? A lot of ganache? In my case…a lot of candied citrus peel? A lot of orange Italian meringue buttercream…?

Well, clearly we shouldn’t throw food or leftovers away, since world hunger and global starvation is a major problem that should not be overlooked. But I’ll get back to that later.

So yes….throwing food away should never be an option. But I’m not here to tell you what to do. Who am I to do that, right? Right.

But if you’re like me and find that you are left with plenty of Italian meringue buttercream after testing certain recipes, I invite you to reinvent the wheel if you don’t do so already and challenge yourself to find new recipes that incorporate leftovers of buttercreams, curds, pie crusts, mousse, cookie dough, etc. It can become a fun and challenging game and you will feel instant rewards for not letting such food rot away in an eternity of disregard in the freezer or…in the garbage.

sweet-lab.com

When I made chocolate orange mini pastries a few days ago I had some orange buttercream and candied citrus peel left over. It’s always easier to work with a larger recipe when making italian meringue buttercream, so I tend to always have some of that laying around in the freezer. I decided to use the left over orange buttercream and candied orange peel and create these cute orange cream phyllo cups. They are quite creamy, quite citrusy, quite smooth, and quite delicious. As you can probably tell, I would much rather eat these than to hold my heart in my hand while tossing spoiled leftovers into the trash.

Going back to world hunger…do you know what’s another great way to help fight it? Yes, you got it! Volunteer at your local community kitchen and use food as a tool to strengthen your community and fight hunger. If you live in the DC metro area and would like to get involved, here are two great places where you can start making a difference. If you don’t live in the DC metro area, I am sure there are local programs to help fight hunger in your community. All you have to do is ask and do the research!

1. DC Central Kitchen—”Through job training, meal distribution, and local farm partnerships, we’re building long-term solutions to the interconnected problems of poverty, hunger, and homelessness.”

2. Miriam’s Kitchen—”Ending chronic homelessness in DC is possible. Permanent supportive housing is the solution. Food is an important part of our work.”

And always remember to share food with others! I swear that nothing can compare to that simple act of giving and to the satisfaction you get when you know that a dish or dessert you made may be nourishing a friend, a relative, a student, someone in need, etc.

But again, I’m not here to tell you what to do!

**Yields 48 phyllo cups. Store at room temperature for one day. Depending on the size of your mini-muffin pans, you may have to bake 2-3 separate rounds of phyllo cups to end up with a total number of 48 phyllo cups**

Ingredients for Orange Italian Meringue Buttercream: 

8 oz sugar

2 oz water

1 T honey

3 oz strained egg whites

10 oz butter, cubed

3.5 tsp orange juice (I didn’t get my hands on orange liqueur such as Grand Marnier, but I believe that replacing orange juice for Grand Marnier would make a great contribution. I suggest adding it a little bit at a time and tasting the flavor until you reach the desired orange flavor).

1.5 T orange zest

Procedure/Recipe for Orange Italian Meringue Buttercream: (Please read all steps first before proceeding in order for the technique to be completely clear from start to finish).

1. Combine water and sugar in a pot. Mix water and sugar with fingers to make sugar is lump-free.

2. Heat water and sugar to 238 F (soft ball stage) and add corn syrup to water/sugar mixture as soon it looses yellow color and it becomes clear. Be sure to watch it closely and attentively.

3. Test the temperature of the sugar by numbing finger in ice-cold water, quickly dipping finger in hot water/sugar mixture, and re-dipping finger right back into cold water. Form the cooled sugar into a ball with your hands. Drop ball onto a flat surface. Sugar is ready when it makes a sound when it reaches the surface and when it doesn’t sink in while resting.If you would rather avoid using this procedure, you can also use a candied thermometer and test the sugar until it reaches 238 F.


4. Begin to whisk egg whites at high speed when sugar has reached or is close to reaching 238 F. Decrease speed to medium after about five seconds, just after egg whites have been broken up.

5. Begin to slowly add the hot sugar to egg whites while egg whites continue to whip, meringue is soft, and yellow color is gone. Be sure to pour sugar from the side of the mixing bowl so that it doesn’t go flying everywhere. Whip meringue/238 F sugar until the bottom of the mixing bowl has cooled off and feels lukewarm to the touch.

6. Add pieces of butter continuously to mixture when egg whites are fluffy and stiff peaks are close to being formed. Stop whipping when buttercream looks fluffy and stiff peaks form.

Store in freezer for 6-8 months. Recondition buttercream before use by warming it up over a double boiler and whipping it until fluffy.

Ingredients for Candied Citrus Peel:

1 orange

2 oz sugar

2 oz water

Recipe/Procedure for Candied Citrus Peel:

1. Scrub oranges in hot water and pat them dry.

2. Cut off pieces of orange peel and cut orange peel into thin strips. Be sure to exclude as much of the white part as possible to decrease extra bitterness.

3. Throw orange peel strips into a pot of boiling water and cook for about 30 seconds. Strain citrus peel.

4. Fill same pot with new water and bring it to a boil. Throw citrus peel into pot and cook for about 30 seconds and strain. Repeat blanching process once more.

5. Meanwhile, combine sugar and water into a pot and cook over medium heat until all the sugar has completely dissolved to create a simple syrup.

6. Bring simple syrup to a boil and cook blanched orange peel in a gentle simmer in the simple syrup until peel is translucent and tender. You must taste the peel to know if it’s fully cooked. Strain citrus peel.

7. Roll citrus peel in granulated sugar.

Ingredients for Orange Cream Phyllo Cups:
orange italian meringue buttercream
candied orange peel
12 sheets of phyllo dough
melted butter
Recipe/Procedure for Orange Cream Phyllo Cups:
1. On a dry work surface place 1 sheet of phyllo. Lightly brush melted butter over the entire sheet of phyllo. Place a second sheet of phyllo over the first sheet and brush with melted butter. Continue until 6 sheets of phyllo stacked on top of each other.
2. Make 2″ marks vertically and horizontally along the edges of the rectangle of phyllo. Cut the stacked phyllo rectangle into equal pieces by cutting lengthwise and then widthwise. At this point you should have 24 cut squares of phyllo dough. Repeat steps 1 and 2 to create 24 additional squares and end up with a total of 48 phyllo dough squares.
3. Gently press each cut square of phyllo into mini-muffin tin cups.
4. Bake at 350 F for about 20 minutes until the edges of the phyllo are golden. Allow phyllo cups to cool off completely.
5. Meanwhile recondition orange italian meringue buttercream by warming it up over a double-boiler and whipping it until light and fluffy. Fill a pastry bag that has a #5 star tip.
6. Pipe orange meringue buttercream into phyllo cups. Finish by placing a piece of candied citrus peel on the tip of the buttercream.

chocolate orange mini pastries

sweet-lab.com

I have a deep appreciation for the fusion of chocolate and orange. Yes, I have written recipes that showcase these two ingredients before…and I know that I will probably do so again…and again and again, since there are always new ways of exploring flavor combinations that I love.

sweet-lab.com

But I already told you…I am kind of in love. Or no, wait. I told you that I am obsessed.

Well, I am probably both: in love and obsessed with the kind, yet powerful union of chocolate and orange. Those two ingredients in unison can compose a symphony of flavors in my palate. The bitterness of the chocolate along with the tartness and sweetness of the orange. Yes, I know I am repeating myself so I will stop right there.

sweet-lab.com

I think the idea for this recipe began with a simple yet delicious dessert I made for my family while visiting Spain.

sweet-lab.com

I could describe the recipe for you, but if you take a look at the photocollage below, you may understand the procedure fairly quickly. First, simply dip orange segments in melted tempered chocolate and finish each segment with premade candied citrus peel and chocolate sprinkles. Suuuuuper easy. Suuuuuuuuper attractive, pleasing, seductive, and delicious.

I never posted the recipe for the chocolate-covered orange segments for solely one reason. Would you care to know why? Well, if you notice in the picture, the chocolate that covers the orange segments is not tempered (Aaaaahh!!!) and untempered chocolate is a big no no, at least to me and many other pastry cooks, chefs, or…pastry nerds..Tempered chocolate has a beautiful shine, a smooth finish, and a satisfying snap. I’m completely addicted to it.

While being in my hometown in Spain, I unfortunately couldn’t find couveture chocolate that is used for tempering. So I simply melted regular bittersweet chocolate and dipped the orange segments in the chocolate, knowing that I would have to remake the recipe once more with the real thing…tempered chocolate. Tempering chocolate can be an intimidating process, but I promise to offer the best and most thorough explanation I am able to provide when I post the recipe for chocolate-covered orange segments…as soon as I get my hands on some couveture chocolate.

sweet-lab.com

Anyways…where was I? Oh yes, of course. Those chocolate-covered oranges inspired me to try other ways of uniting chocolate and orange. Thus, these chocolate and orange mini pastries were born. Layers of lightly flavored orange cake and orange Italian meringue buttercream are layered and glazed with ganache. Then they are finished with candied orange peel and chocolate sprinkles…Enjoy!

sweet-lab.com

sweet-lab.com

**Yields approximately 15 mini pastries. Freeze 4-6 weeks without ganache. Keep at room temperature for 3-4 days.**

Note: The Italian buttercream along with the cake and candied citrus peel can be done days in advanced. The cake and the Italian buttercream can be frozen until you’re ready to assemble the mini pastries. I deeply discourage you from doing all four recipes on the same day. That might just drive you insane. 

Ingredients for Orange Italian Meringue Buttercream: (I like to have leftover buttercream every time I make it and freeze it for later use. If that’s not the case for you, you can cut the recipe in half).

12 oz sugar

3 oz water

2T honey

4.5 oz strained egg whites

15 oz butter, cubed

4 tsp orange juice (I didn’t get my hands on orange liqueur such as Grand Marnier, but I believe that replacing orange juice for Grand Marnier would make a great contribution. I suggest adding it a little bit at a time and tasting the flavor until you reach the desired orange flavor).

2 T orange zest

Procedure/Recipe for Italian Meringue Buttercream: (Please read all steps first before proceeding in order for the technique to be completely clear from start to finish).

1. Combine water and sugar in a pot. Mix water and sugar with fingers to make sugar is lump-free.

2. Heat water and sugar to 238 F (soft ball stage) and add corn syrup to water/sugar mixture as soon it looses yellow color and it becomes clear. Be sure to watch it closely and attentively.

3. Test the temperature of the sugar by numbing finger in ice-cold water, quickly dipping finger in hot water/sugar mixture, and re-dipping finger right back into cold water. Form the cooled sugar into a ball with your hands. Drop ball onto a flat surface. Sugar is ready when it makes a sound when it reaches the surface and when it doesn’t sink in while resting.If you would rather avoid using this procedure, you can also use a candied thermometer and test the sugar until it reaches 238 F.


4. Begin to whisk egg whites at high speed when sugar has reached or is close to reaching 238 F. Decrease speed to medium after about five seconds, just after egg whites have been broken up.

5. Begin to slowly add the hot sugar to egg whites while egg whites continue to whip, meringue is soft, and yellow color is gone. Be sure to pour sugar from the side of the mixing bowl so that it doesn’t go flying everywhere. Whip meringue/238 F sugar until the bottom of the mixing bowl has cooled off and feels lukewarm to the touch.

6. Add pieces of butter continuously to mixture when egg whites are fluffy and stiff peaks are close to being formed. Stop whipping when buttercream looks fluffy and stiff peaks form.

Store in freezer for 6-8 months. Recondition buttercream before use by warming it up over a double boiler and whipping it until fluffy.

Ingredients for Orange Cake:

3 oz cake flour

5 oz AP flour

1 tsp salt

1/4 tsp baking soda

1 tsp baking powder

6 oz sugar

4.5 milk

3.5 orange juice

4 oz egg

4 oz vegetable oil

1 tsp vanilla

3 1/2 tsp orange zest

Recipe/Procedure for Orange Cake:

1. Sift cake flour, AP flour, salt, baking soda, and baking powder into a large bowl.

2. Add sugar to dry ingredients and mix well to combine.

3. In a different bowl, whisk milk, orange juice, eggs, vegetable oil, and vanilla together.

4. Combine the wet and dry mixtures together, just enough so that all ingredients are incorporated into the batter. Do not over mix.

5. Add orange zest to batter. Allow batter to rest 20-40 minutes in fridge.

6. Spray a rectangular 13″ x 9″ x 2″ cake pan with vegetable oil and place a piece of parchment paper on the bottom of the pan. Pour cake batter into pan. Bake at 350 F for about 20-25 minutes, until a toothpick that is inserted in the center tests clean. Allow to cool in cake pan.

7. Place a large cutting board over cake pan. Flip cake over onto cutting board and remove parchment paper. Flip cake over once more onto another cutting board so that the top of the cake is on the top. Set aside for later use.

**Keep well wrapped at room temperature for 3-4 days. Freeze for 6-8 weeks**

Ingredients for Candied Citrus Peel:

1 orange

2 oz sugar

2 oz water

Recipe/Procedure for Candied Citrus Peel:

1. Scrub oranges in hot water and pat them dry.

2. Cut off pieces of orange peel and cut orange peel into thin strips. Be sure to exclude as much of the white part as possible to decrease extra bitterness.

3. Throw orange peel strips into a pot of boiling water and cook for about 30 seconds. Strain citrus peel.

4. Fill same pot with new water and bring it to a boil. Throw citrus peel into pot and cook for about 30 seconds and strain. Repeat blanching process once more.

5. Meanwhile, combine sugar and water into a pot and cook over medium heat until all the sugar has completely dissolved to create a simple syrup.

6. Bring simple syrup to a boil and cook blanched orange peel in a gentle simmer in the simple syrup until peel is translucent and tender. You must taste the peel to know if it’s fully cooked. Strain citrus peel.

7. Roll citrus peel in granulated sugar.

Ingredients for Ganache:

12 oz heavy cream

12 oz semisweet chocolate, finely chopped

Recipe/Procedure for Ganache: (this recipe should be done right when the rest of the cake has been assembled to prevent ganache from thickening so much it will can not be used to glaze mini pastries). 

1. Heat heavy cream and bring to a simmer.

2. Put chopped chocolate in a large bowl and pour simmered heavy cream over chocolate. Allow cream and chocolate to rest for about a minute so that chocolate softens and melts.

3. Stir/whisk mixture gently from the center and whisking outwards until everything is well emulsified.

**Store at room temperature for 2-4 days**

Thank Goodness! The time has come to put it all together…

Ingredients:

orange cake

orange Italian meringue buttercream

ganache

candied citrus peel

chocolate sprinkles

Procedure:

1. Build and assemble your cake:

a) Place the cake on a stable surface to work on comfortably. A large cutting board works well for this type of assembly.

b) Trim off all four edges of cake and then cut cake in half with a serrated knife to end up with two thin layers of cake.

c) Cut cake in half down the center vertically to end up with four thin layers of cake.

d) Recondition buttercream to begin cake assembling.

e) Place a layer of cake layer on a cutting board. Spread orange buttercream filling on the surface of the cake layer so that it reaches every corner.

f) Place second cake layer over orange buttercream.

g) Spread orange buttercream filling on the surface of the second cake layer so that it reaches every corner and smoothen it out evenly. Repeat the spreading of buttercream and the layering of cake layers until all the 4th cake layer is on top and cake is about 1.5″ tall.

h) Make sure layers look flat and straight. If they don’t look flat, gently push down on the cake.

j) Put a big dollop of orange buttercream in center of cake and work icing with spatula in order to cover entire surface of cake until it reaches the edges. Cover edges of cake as well.

k) Smoothen top of cake by starting at the edge and coming straight across with spatula at a flat angle until surface is as smooth as possible.  Place cake in fridge and chill for about 10-15 minutes before

l) Hot knife the cake: Bring water to a boil and pour it into a tall cup/beaker. Dip spatula into hot water. Dry spatula and pass it over sides of cake and then over top as well to create smoother and cleaner surface all around. Be sure to dip spatula into hot water after every pass to remove excess icing. Dry spatula and continue passing it gently over the surface of cake to smoothen it even more.

2. Cut cake.

a) Take flat cutting board w/ parchment paper and put even pressure and press down so that surface of cake is completely flat. Leave board over it and refrigerate.

b) Make 1.5” marks on top/bottom and sides of cake layers. Cut strips horizontally and vertically to end up with 1.5” squares.

3. Glaze cake.

(Use room temperature ganache that is at liquid state. Hot ganache will melt buttercream on cake. Ganache that drips onto plastic wrap after glazing cakes can be collected and used again for reglazing or for other purposes. If used for glazing, be sure to act quickly before it cools and the consistency becomes too thick).

a) Place iced cakes over a rectangular cooling rack that is covered completely with plastic  wrap.

b) Pour ganache at one edge of cake and move bowl of ganache to opposite end in order to cover entire cake. Repeat same procedure with all cakes.

c) Allow chocolate to set at room temperature for about 5 minutes. Sprinkle chocolate sprinkles over the surface of cakes and finish by placing a strip of candied citrus peel in the center.

sweet-lab.com