fried baklava with honey cinnamon cream

DSC_0381 copy

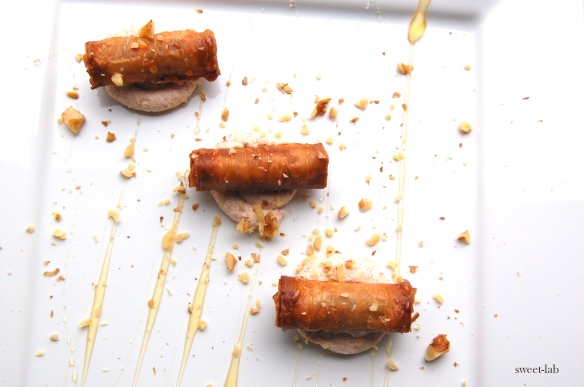
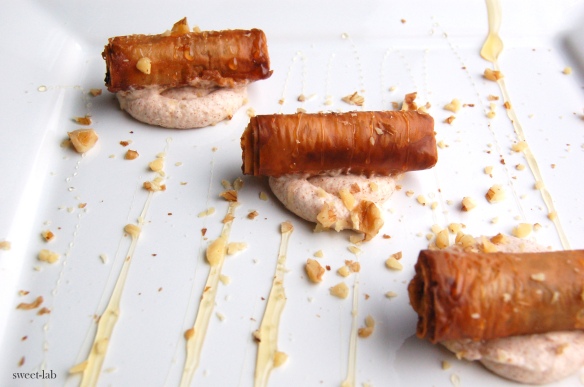
Two words for you: Fried Baklava. I’ll let the pictures say the rest.

But really, this recipe is simple to execute and super gratifying to taste. It’s magnificently light and crispy on the outside while being decadently rich on the inside. The blend of honey, cinnamon, dates, and nut flavors will keep you coming back for more. More good news? Once the baklava are assembled, you are bound to enjoy them in a matter of seconds, as this baklava is…fried.

DSC_0343

On another note, today is February 3, 2013. For me it’s just another regular Sunday, but for  a multitude of other people, today is the Super Bowl, an event that in my opinion holds just as much power as a holiday.

DSC_0339

Over the years, I have never watched the Super Bowl. I know nothing about the sport of football. Like really….. nothing. Oh wait, I guess I do know that people tend to enjoy chips and salsa, chili, various types of dips, an assortment of precut veggies, and of course….lots and lots of booze. And then there’s the other stuff. This year for example, Beyoncé will perform during half time. And those commercials…aren’t they good? See? I know a thing or two.

DSC_0349

I have zero emotional connection to this sport, so instead of watching the Ravens and the 49ers fight over the Super Bowl trophy, I am keeping myself busy by reviewing this recipe I wrote a few days ago and bringing it to you. I hope you enjoy this as much as you may or may not enjoy the Super Bowl!

Yield: About 24 pieces. Serve immediately.

DSC_0345 copy

Ingredients for Baklava Filling:

3/4 C dates, roughly chopped

1/2 C walnuts

1/4 C pecans

1/4 tsp cinnamon

1 1/2 tsp honey

small pinch of salt

Recipe for Baklava Filling:

1. Combine all ingredients in a food processor and pulse until mixture is finely grounded and comes together to form a paste. Set aside for later use.

IMG_4737

Ingredients for Honey Cinnamon Cream:

1 C heavy cream

1/4 C honey

2 tsp cinnamon

Recipe for Honey Cinnamon Cream:

1. Combine heavy cream, honey, and cinnamon in bowl. Whisk until cream thickens and stiff peaks form. Refrigerate and set aside for later use.

Ingredients for Fried Baklava:

phyllo dough

baklava filling

egg wash

vegetable oil for deep frying

honey cinnamon cream

honey

walnuts, toasted and finely chopped

Recipe for Fried Baklava:

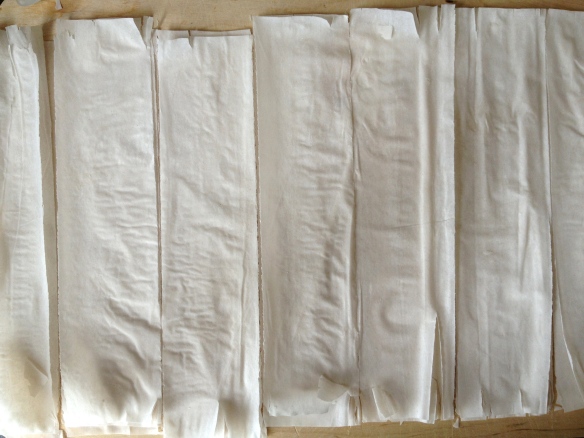
1. Stack three sheets of phyllo dough over a cutting board. Make 2″ marks along the bottom edge of stack. Cut vertically along each mark to create 2″ strips.

IMG_4745

2. Scoop 1/2 tsp of baklava filling. Form the filling into a ball with your hands and form the ball into a cylinder.

3. Place the cylinder at the bottom of each strip of phyllo dough.

IMG_4753

4. Lightly apply eggwash along the strip of phyllo dough with a pastry brush.

5. Roll phyllo dough over the filling and keep rolling until the dough has gone around the filling four times. Cut across the phyllo dough to separate the roll. Place roll on a dish with seam side down. Repeat steps 1-5 until all of the filling has been used.

IMG_4756IMG_4752IMG_4759

6. Heat up vegetable oil in a small sauce pan over low-medium heat and fry until golden brown. This happens fairly quickly, about 8-10 seconds.

7. Place fried baklava over a napkin to soak up excess oil.

8. Meanwhile, place honey cinnamon cream in a piping bag that has a #3 plain tip. Pipe spirals of cream on a serving plate. Place baklava over cream. Finish with a drizzle of honey and a sprinkle of finely chopped toasted walnuts.

IMG_4766

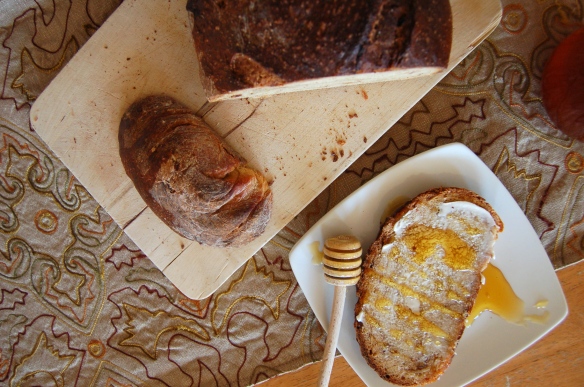
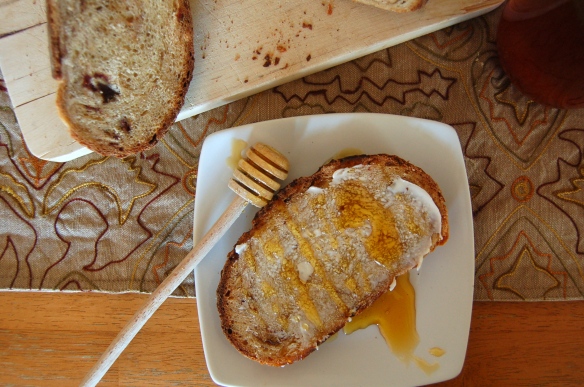
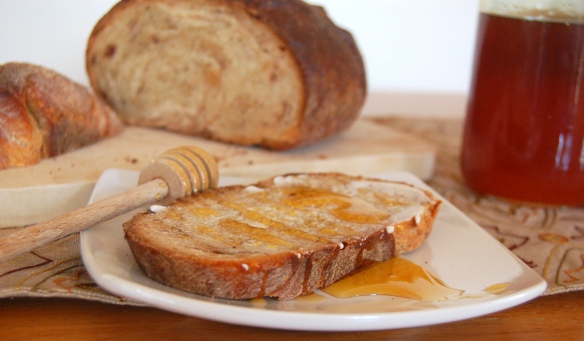
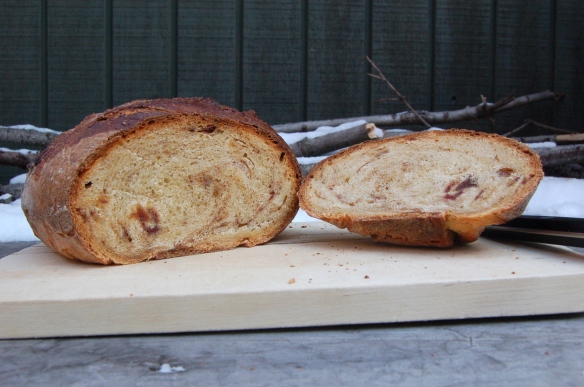
honey date bread

sweet-lab

sweet-lab

“I need to write a sweet-lab thing…”. Those are the exact words I just shared with Mark as I was clicking away and making my way to the sweet-lab wordpress site. Well, that certain “thing” is actually called a post. Although it has been such a long time since the last time I wrote one that I think I had momentarily forgotten its correct term.

sweet-lab

sweet-lab

Yes, it’s been a while since the last post.

But let’s be real for a minute. This whole process called “blogging” can be a pain in the ass sometimes. You know it as well as I do. I love it, don’t get me wrong. In fact, I don’t think that I would enjoy life near as much without it and it has been my joy for many months. I miss it when I’m not baking or writing for it, but man oh man.

sweet-lab

sweet-lab

sweet-lab

sweet-lab

Sometimes, just thinking of all the different steps involved in sharing a post makes me want to pull my warm silky blanket over my head and pretend I haven’t even heard of http://www.sweet-lab.com. And if my apartment doesn’t have an adequate amount of natural lighting, am I really supposed to go out in this 20 degree weather to capture better quality pictures?!! Yes. The answer is always yes.

sweet-lab

sweet-lab

But thankfully that motivation eventually returns. Eventually I start getting antsy when I haven’t created any new recipes for the site. I get the sudden urge to get myself together. I need to get myself in the kitchen and create something tasty, because when I’m in there doing that, I swear that that’s what I was born to do and it is all worth it.

sweet-lab

sweet-lab

sweet-lab

sweet-lab

So here it is. This recipe for this honey date bread was the little bit of inspiration I needed to get off my butt on a free day and into the kitchen, take some pictures, and type this up in order to share this with you.

Because you know, it’s what I love to do.

sweet-lab

sweet-lab

sweet-lab

sweet-lab

Ingredients:

15 oz unbleached bread flour

2 tsp salt

9 oz warm water

1 T active dry yeast (equivalent to 1 small package of 5/16 oz or 8.75 g)

3 oz honey

1/2 C dates, pitted and roughly chopped

1/4 C fine oat bran

1 egg and additional salt for finish

Recipe:

Note: This recipe is done in stand mixer but it can also be done by hand. The mixing time will just be longer.

1. Combine bread flour and salt in mixer with a paddle attachment and mix on low speed until flour and salt are well combined, about 15-20 seconds.

2. Mix warm water and honey in a small bowl. Sprinkle yeast over water and honey mixture and allow yeast to dissolve.

3. Drizzle water/honey/yeast mixture into mixing bowl while mixing on low speed. Change to hook attachment and increase to low-medium speed on the mixer. Continue mixing until dough becomes smooth and elastic in appearance, about 10-20 minutes. Test the dough by cutting a small piece of dough and stretching it out gently. If it tears, continue mixing. If the dough becomes translucent before it tears, the gluten in the dough has developed correctly and the dough can stop mixing. This test is known as the windowpane test.

4. Turn mixing speed to low and gradually and gently add the dates, followed by the oat bran. Continue mixing on low until all solid ingridients are fully incorporated into dough.

5. Remove mixing bowl from machine and cover with plastic. Allow dough to rest in a warm place until it doubles in size, about 1 hour. Press a finger into dough. If dough springs back, it needs to rest longer. If it doesn’t spring back, it has rested and fermented long enough.

6. Return dough to a floured surface and knead to expel gas. Cover dough with kitchen towel and rest briefly for 10-15 minutes.

7. Knead and shape dough into a boule by pushing it back and forth in a circular motion over a floured surface until it reaches the shape of a smooth round ball.

8. Cover the with plastic wrap and refrigerate for up to a day. Remove dough from refrigerator and allow to rest at room temperature for at least 1 hour before baking.

9. Remove dough from bowl and place it over a baking sheet that has been covered with parchment paper, being careful to keep the shape of the boule and tightening it if necessary by moving it in a circular motion over a floured surface before placing it on baking sheet. Score the surface of the dough with four lines to create the shape of a diamond. This will help the dough expand and create precise paths for carbon dioxide to escape when the pressure becomes too great inside the dough during oven spring. It also improves the overall aesthetic of the bread.

10. Egg wash the surface of dough with a pastry brush and sprinkle it with with kosher salt.

11. Place a cast iron pan on the bottom rack of the oven and fill with one cup of water when ready to bake. Place bread on the top rack and bake at 450 F for 10 minutes. Keep pouring water into the cast iron pan throughout baking time to create more steam inside the oven. If you don’t have a cast iron pan, you can use an old baking sheet she as well. Reduce oven temperature to 375 F and continue baking until done, about 45-50 minutes. Bread should make a hollow sound when it’s done and should have an internal temperature of 180 F – 210 F.

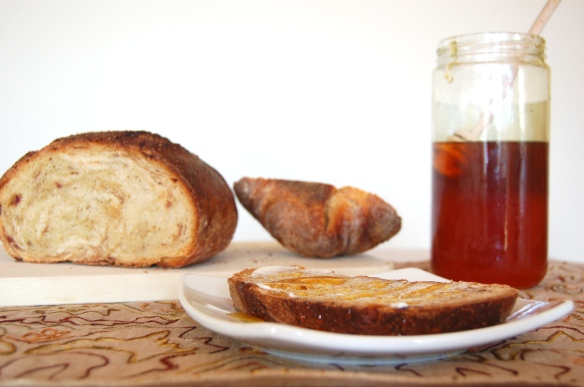
Cut yourself a slice, spread butter and drizzle honey over it…or simply enjoy it by itself!

sweet lemon almond smoothie • sooth your throat

sweet-lab

This is probably not what you had in mind. It’s not what I had in mind either.

We are amid holiday spirit and Christmas cheer, so why in the hell is this recipe not one that showcases cookies, ginger spice bread, or other holiday favorites? Well, I also wasn’t expecting to resort to a smoothie today and I much rather create a recipe for say a pumpkin roulade, a chocolate peppermint cake, or an eggnog whatever. Never mind. Scratch the last example. I don’t particularly enjoy eggnog.

sweet-lab

Anyways, those are the sort of recipes that are to be expected in mid-December, right? I mean every food blogger out there is presenting favorite holiday recipes and what do I have to offer? A smoothie! But it is what it is and I am completely okay with that. One should never underestimate the power of a smoothie, especially when it can help sooth your sore throat. To be fair, I have also had the opportunity to make crunchy nutty choco toffee, cookies, peppermint truffles, and other holiday treats. Plus, the holidays are no way near over and there is still time to make traditional or new holiday sweets. So I am not complaining at all (even if my tone suggests otherwise).

sweet lemon almond smoothie

I have been feeling a little under the weather during these past few days and this smoothie has done magical things to heal the pain and scratchiness in my throat. If I had to compare my voice to that of any known figure you would know, it would have to be to the exorcist girl. Let it be known that I do not have the ability to spin my head 360 degrees around my own torso and I do not possess the talent of vomiting green junk when I am feeling irritated or furious. That would be insanely insane though. But my voice…oh yes, the sound of my voice in these past few days could be used in the next exorcism movie,…because we all know there will be plenty more of those coming out in the near future.

Going back to what’s important. This smoothie contains ingredients that will help alleviate a soar throat. Lemon contains high levels of vitamin C and natural antibacterial/antiviral agents. Almonds and honey are natural pain killers that will relieve the inflammation. Apple is one of those fruits that will help ease lung and throat irritation all year round and add smoothness and fullness to the smoothie. The boost of vitamins and combination of healing ingredients do not compromise good flavor. Not at all! This smoothie is delicious with a dominating sweet honey and almond flavor and a spark of refreshing fresh lemon juice. That sore throat will stand no chance of winning once it meets this sweet lemon almond smoothie!

sweet-lab

* Yields about 1 1/4 C. *

Ingredients:

6 fl oz almond milk

1/4 C raw almonds

1/4 C Gala apples–peeled, cored, chopped

1.5 fl oz lemon juice (=3 T of lemon juice)

2 T honey

Recipe/Procedure:

1. Combine almond milk, raw almonds, apple, lemon juice, and honey into a blender. Blend until fruit and almonds are completely pureed. Serve immediately.

honey mango cookies • thank you sweetness

sweet-lab.com

Dear Baking,

Thank you.

I’m grateful that I have you and I consider myself fortunate that our paths have crossed. Without you…well, without you I honestly think I would still be alright. Things would be pleasant and manageable. I presume that in another life I would’ve found “someone” else. Maybe drawing. Maybe pottery. Maybe kickboxing…??

sweet-lab.com

But no, I found you and I’m thankful for that every day.

sweet-lab.com

Because when we’re together, it’s really just you and I…in perfect harmony. Well sometimes, we’re not so harmonious after all. But we work through it all in an elegant manner and we make a lovely couple…don’t you think?

sweet-lab.com

The irritating thoughts and potential problems I might encounter may still be present, but really…when I’m with you, a high degree of calmness and serenity takes over. You are my other best buddy. Thank you for scooping me up from below when I was/am feeling down and thank you for making the merry times even merrier!

sweet-lab.com

Thank you for bringing sweetness to my life and for also making it possible for me to feel creative while writing/creating recipes such as the one I developed today.

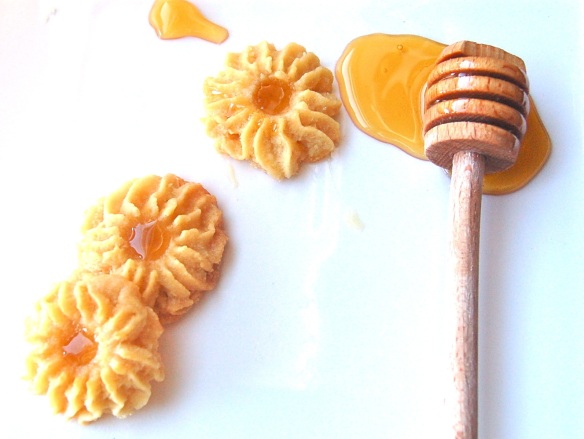
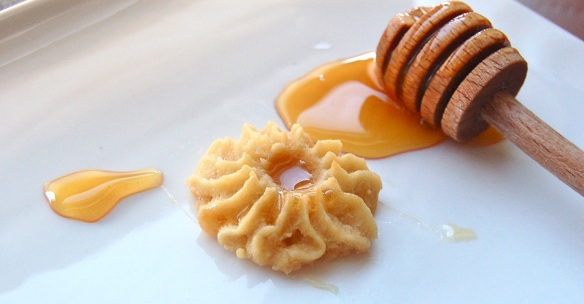
Honey mango cookies!!!!

sweet-lab.com

Hypothesis: 

 – I only have 1 mango in the fruit basket. 1 mango will probably not be enough to make a distinctive mango flavor for the 24 oz of cookie dough I will make. I will try it anyways…

– honey, sugar, caramelized mango  = yum yummms.

– adding caramel to the cookie dough, will add nice flavor and moisture to the dough, making it easier to pipe.

sweet-lab.com

Materials/Ingredients:

2 mangos (I used one, but my hypothesis proved to be true. One mango was not enough to flavor the dough and make it have a strong mango flavor. Either use 2 mangos or cut the quantity of ingredients by half. I think that will work better).

4 oz granulated sugar

4 oz butter

4 oz vegetable oil

1 tsp vanilla

1/2 tsp salt

12 oz flour

honey

additional granulated sugar for finish

Procedure/Recipe:

1. Dice mangos very finely.

2.  Make a dry caramel with the 4 oz of sugar:

a) Add a layer of sugar into a shallow pot/pan on high heat.

b) Smoosh sugar with a silicon spatula and begin to add more sugar slowly as sugar begins to melt and caramelize.

c) Continue to smoosh sugar until caramel is smooth.

* Be sure that your spatula is heat proof!! Mine wasn’t so I had to start over. Fail. If your spatula isn’t heat proof, a wooden spoon will work just fine.

3. Add finely diced mango to caramel and stir vigorously until the sizzling stops. Cook on low-medium heat until mango softens and cooks all the way through. Remove from heat and set aside.

4. Meanwhile, cream butter, vegetable oil, and sugar in a mixer.

5.  Add vanilla and continue mixing until all ingredients are well blended.

6.  Add flour and salt and turn mixer to low speed as soon as dry ingredients are blended well into mixture. Be sure to scrape sides of bowl down when necessary.

7. Add caramelized mango to dough, being sure that all the liquid caramel becomes incorporated as well. Continue mixing until all ingredients are well mixed.

8. Place dough into piping bag that has a # 5 star tip. Begin piping logs that are about 2″ long on a sheet tray that has been covered with parchment paper. Sprinkle logs with granulated sugar.

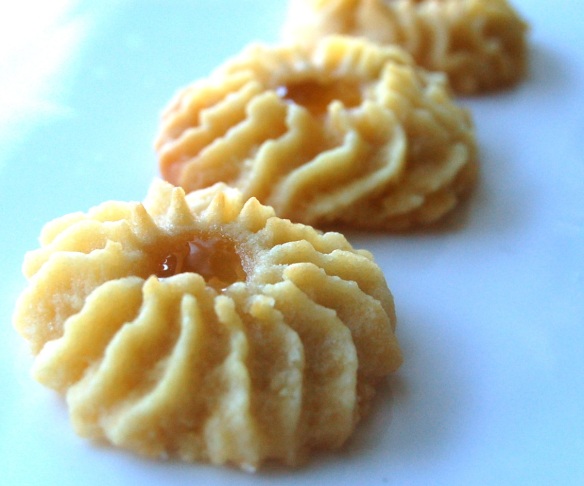
You can also pipe stars that are about 1″–1.25 ” in diameter. After piping stars, gently poke the center with a rod.

9. Refrigerate/freeze cookies for 10-15 minutes, just until they are chill and firm.

10. Bake at 350 F for about 13-14 minutes, until cookies have a nice golden color. Rotate baking sheet midway baking time.

11. Allow cookies to cool and pipe honey into the indentation of the star cookies to fill up the space completely.

Enjoy!

 Observations:
– Superb rich, crispy, and sweet shortbread cookie.
– It has a complex sweetness that you couldn’t achieve by just adding granulated sugar to the dough. Three types of sweetners (granulated sugar, honey, and caramel from cooking the magos) + caramelized mangos are responsible for creating such a sweet wonder.
– I made my dough with 1 mango and like I mentioned before, the mango flavor was not as prominent as it could’ve been. That’s why I think that adding one more finely diced mango will work beautifully. 2 mangos total!

Results/Conclusion: Somehow I still have a few more cookies left. Yeaaaah…I’m about to change that. These cookies are just so flavorful!!

sweet-lab.com

dark chocolate & orange wontons • a purposeful shortcut

sweet-lab.com

It’s the weekend. Happy? Yes. Would be happier if it was Friday night, right? Maybe, depending on your work schedule. Although Sunday is my fun day, it has never been as fun as Saturday because it’s just a bit too close to Monday. Make sense? Great.

sweet-lab.com

Anyways….it’s the weekend nonetheless and it’s just one more day that I don’t have to wake up in the wee hours of the morning. That’s a good thing. Sometimes I feel that the only other cursed ones awake at 5:00 am are the cockroaches in the nearby alley.

sweet-lab.com

It’s during the weekend when I get to write this blog and bake up a storm and I enjoy that to the max. This weekend, however, I’m taking a bit of shortcut. You know, kind of like that shortcut that you take to get home 10 minutes quicker than your guests who are about to arrive with booze while you are still at the grocery store buying plastic cups.

That’s kind of what I did in the kitchen. Scaling ingredients was not required. Dirtying bowls and whisks was not necessary. Preparation time did not exceed 10 minutes. But let me clarify something: taking a shortcuts is not equal to cheating.

sweet-lab.com

Shortcuts are okay, I have concurred. As long as there is a legitimate reason for taking them. As long as they work. As long as the final product, in the words of a nerdy design teacher I once had, “Wows” your audience.

sweet-lab.com

Modern Art and Cubism may serve as examples of what I’m trying to explain. Five blue/black strokes painted horizontally across a large white canvas may seem as a cheap shortcut to some, but I’m sure that the artist had a reason for taking such simplistic style and approach. We may never know what his/her motivation was, but in my opinion if the art form makes you question things or strike up a conversation and/or any brain activity, then it has done part of its job successfully.

sweet-lab.com

sweet-lab.com

I won’t even TRY to compare myself to such ingenious artists, but sometimes I do make things seem little more simple for myself and for the audience and I’m totally okay with that. My reasons for taking today’s shortcut? I’m simply a bit busy with chores/work and feeling sluggish this weekend. I also have leftover dark chocolate, candied citrus peel, and simple syrup from last weekend’s recipe that are calling my name. Orange and dark chocolate go wonderfully together. Are those not considered to be legitimate reasons? I know, maybe not….I’m sorry, but I didn’t say we would agree on everything 🙂

sweet-lab.com

So I can’t promise you that I will “wow” you like a true artist would with this dessert. I’m just simply taking a shortcut. I will call it: A purposeful shortcut!

sweet-lab.com

Ingredients:

dark chocolate, roughly chopped

candied orange peel

wonton wrappers

water or egg wash

orange zest

vegetable oil

3 oz sugar

3 oz water

(honey)

Procedure/Recipe:

1. Make candied orange citrus peel. Click this link to a get a full and detailed description of steps with pictures.

2. Make simple syrup: combine sugar and water in a small sauce pan and cook over medium heat until all sugar dissolves. Set aside.

3. Prepare wonton wrappers, chopped chocolate, candied orange peel, and water/egg wash in front of you to assemble.

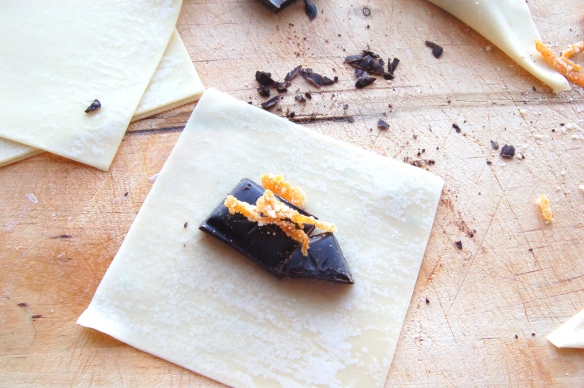
4. Place some chocolate over a wonton wrapper. (Note: Try to add a bit more chocolate than what the pictures show because after frying them, the wontons puffed up and there was a bit of a hollow space inside that the melted chocolate didn’t completely fill up. I think that more chocolate could have been added to fill up the cavity more fully. Simply stack more chocolate on top so that the sides of the wonton wrapper can fold over without hitting the chocolate).

5. Place candied orange peel over the chocolate.

6. Brush some water or egg wash along the sides of the wrapper. You can apply the water/egg wash with your fingers as well.

7. Fold the sides of the wonton wrapper over to seal.

8. Heat up vegetable oil in a small sauce pan and fry until golden brown, about 30 seconds per side.

9. Place fried wontons over a napkin to soak up excess oil.

10. Finish with a pinch of orange zest and a drizzle of simple syrup or honey.

sweet-lab.com

sweet-lab.com

Is this shortcut okay with you?

pestiños • secret family recipe (made in spain)

sweet-lab.com

Sssshhhh….

(I’m in whispering mode).

Let’s do something a little bit different. Oh, how incredibly rude of me. First things first. How are you enjoying your holidays?

I went  back to Spain, but I didn’t experiment much with food this time. I didn’t create anything new. Nope. I went back home and baked one single sweet dish that has been around for ages. Not apple pie, not ginger bread, and certainly not sugar cookies. Believe me when I say that I do have much appreciation for all of those sweets I have just mentioned, but it’s just not what goes on in Andalucia, the southern region of Spain.

sweet-lab.com

When I go to Spain for Christmas we go all out and bake pestiños using 2 kilos of flour. That’s about 4 1/2 pounds of flour! Oh, and each pestiño is individually hand-crafted!

Pestiños are small pieces of dough that are deep-fried in olive oil and glazed with honey. They are traditional Christmas sweets that are enjoyed all throughout Andalucia and are a sweet indication of their muslim origin and of the muladies who wandered Andalusian land until the Reconquista. Its flavors speak of the influence these people left behind.

sweet-lab.com

sweet-lab.com

Every family has their own recipe and special variation. Our family recipe comes from my dearest aunt Carmelina. We value her recipe so much and hold it to be so sacred that I’m allowing myself to be very vague when presenting it. I considered it to be legitimate when offering you an idea and understanding of how to prepare these glazed pieces of dough without really disclosing all the details and exact quantities of the ingredients. That would be a no no. The words “vague” and “recipe” should never go together, but this is a special occasion.

sweet-lab.com

I’m sure that if you’re pretty in tune with your baker instinct you will be able to replicate these sweets just by following the procedure and being guided by the pictures I provide. I’m also confident that you may use inference and common sense to fill in the cloudy and ambiguous gaps if you really wanted to replicate these. They are kind of labor-intensive but totally worth it.

So once again, please forgive me for not being able to present this recipe in the usual and detailed manner I usually present other recipes, but it just wouldn’t feel right. I cannot take credit for this one and my conscious has to feel clean after this. I’m just a humble niece following her aunt’s amazing recipe. If you have any questions regarding this recipe feel free to contact me and I may disclose a thing or two…

sweet-lab.com

Procedure/Recipe:

1. Fry orange peel, sesame seeds, and matalauva (anise seeds) in olive oil until ingredients become slightly golden and olive oil has absorbed the flavors of all the ingredients.

2. Drain olive oil into a large pot and allow it to cool completely.

3. Add orange juice, sherry wine, and anise to olive oil.

4. Slowly add “pestiño flour” to oil. Sitr to combine.

5. Keep dough in large pot. Knead and press dough down vigorously and forcefully with knuckles until dough is completely smooth.

6. Form dough into a ball and poke a hole in the center. Drape a towel over dough and allow it to rest until dough doesn’t bounce back when it’s poked, about 1 ½ hrs.

7. Divide dough into medium-sized balls and roll each one into a very thin layer that’s about 1/16″-1/8” thick.

8. Punch out flattened dough into tiny circles.

9. Flatten each circle slightly with palm of hands and fold opposite sides of circle towards each other so that one side overlaps the other. Pinch down in the center.

10. Fry in olive oil until golden.

11. Combine honey and water in a pot and bring it to a gentle simmer. Drop a handful of pestiños into honey/water mixture and stir gently until pestiños get a chance to become completely soaked and glazed in the honey. (Be sure that the honey doesn’t become too hot or it will harden. If that happens the pestiños well resemble candy. The layer of honey should be soft and gooey, but it should not crack or stick to your teeth).

12. Drain off excess honey and serve on a large tray and wrap with tin foil or keep them in an airtight container.

If you’re like me…fill a tupperware full of pestiños and transport them wherever you go. These traveled with me from Spain to DC. What wonderful taste of southern Spain in just one bite!

sweet-lab.com

sautéed apples and pears with toasted nuts • how about them apples…and pears?

sweet-lab.com

Did you stuff your face for Thanksgiving? Yep, it’s a given. In fact, it would be strange if you didn’t stuff yourself, because isn’t that what everyone does during that day? Come on…eat more…all the cool kids are doing it.

Rule # 1 of Thanksgiving: Be thankful and eat. Rule #2: Eat. Rule #3: Unbuckle your pants and eat some more. Bonus points for Thanksgiving: Wake up in the middle of the night and eat.

sweet-lab.com

So after eating and eating food, do you have a bunch of fruit and nuts leftover after baking pies, crisps, and various side dishes?

I do! After making an apple pie, a pear upside down cake, and other goodies for the feast, look at how much fruit and nuts I have leftover. Oh my. I still have…..

a bunch of apples and a couple of lemons,

a whole bunch of pears,

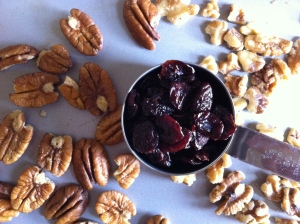
nuts, and dried cherries.

But I won’t for much longer! I plan to use these items in smoothies, salads, apple sauce, and this little dish that I present to you today. This dessert is a simple way to use these items and a also healthier method to satisfy your sweet cravings. I hope you enjoy this as much as I do.

sweet-lab.com

Materials/Ingredients:

1 T olive oil

4 apples – cored, and sliced to 1/8″ thickness –> I used a combination of honey crisp and granny smith. I also chose not to peel the apples to give more color to the dish.

2 pears – cored, peeled, and sliced to 1/8″ thickness

1/2 tsp cinnamon

(1 T brown sugar)—> parentheses means that this ingredient is optional

(pinch of salt)

2 tsp lemon zest

1 T lemon juice

1/2 C pecans – toasted and chopped

1/2 C walnuts – toasted and chopped

1/3 C dried cherries

honey

Procedure/Recipe:

1. Heat up olive oil in a sauté pan. Sauté sliced apples and pears.

2. Add cinnamon, brown sugar, and salt. Stir well to combine.

3. Add lemon zest and lemon juice when fruit begins beings to soften, after about 3-4  minutes.

4. Cook apples and pears until they begin to slightly caramelize and achieve a golden color. Mix in pecans, walnuts, and dried cherries and stir.

5. Serve caramelized fruits and nuts in a bowl and drizzle about 1-2 teaspoons of honey over fruit.

Observations:

– Since I didn’t use brown sugar or butter, there wasn’t a strong presence of caramelization but there was some. The taste was more fresh and crisp as opposed to a warm caramel flavor.

– The sliced apples and pears were slightly crunchy due to the quick sautéing they got. That, along with the toasted nuts, gave nice texture to this dish.

– The lemon zest, lemon juice, and dried cherries offered a level of tartness that created a fine balance for the sweet fruit and honey.

Results/Conclusion: It’s easy to eat more and more of this dish because it’s lighter and not as sugary as other desserts. Therefore, I can make more of it and get rid of all the extra fruit and nuts that I have while enjoying this delectable treat. 😉 Multi-tasking is important! On top of everything, making a dish like this can be a practical and healthy way to re-purpose all of the leftovers you have – after all, you’ve just spent several days gorging. Time to go back to being healthy…. right?

sweet-lab.com