sweet-lab.com
It’s better late than never. At least that’s what they say.
It’s better to wait one year before visiting home, than to never be visiting home at all. It’s preferred to wait months, days and days, and prolonged hours without seeing your other half, than to never be seeing him/her at all.
I would rather go the entire summer without stepping into the cool ocean water and go to the beach for the first time in late September, than to not enjoy such bliss at all.

And if you’re running late, it’s better to catch the next train, instead of catching no train at all.
As for this recipe, it’s been on hold for more than one month. In one month many things can happen. I suppose that life can happen: moving to a new apartment, work, work, work, a trip to Austin, mom visiting from Spain, going up to New York City, sleeping in a tour bus, etc.

But here it is now. You know…because it’s better late than never.
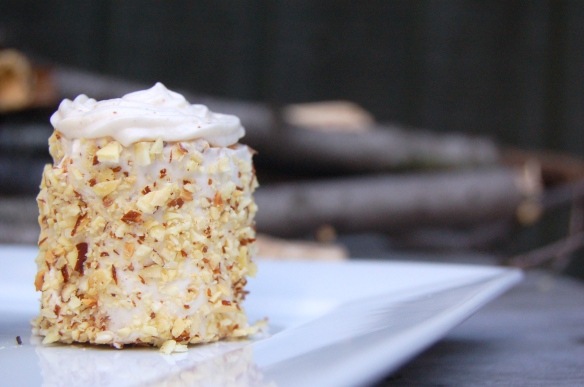
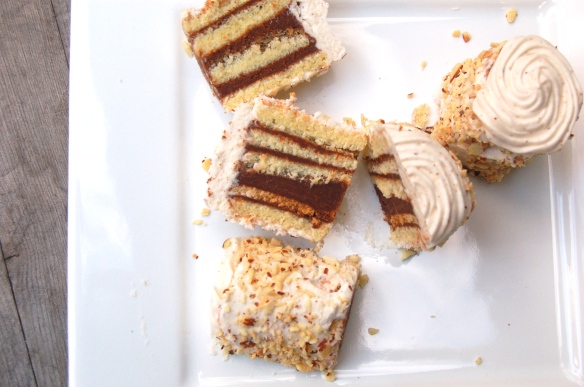
Overview: This is a three layer cake that has many independent components that are all combined in the end. The upper and lower layers are filled with a raspberry Italian meringue buttercream that is flavored with a raspberry coulis. The middle layer is filled with lemon curd. The whole cake is iced with lemon Italian buttercream that is flavored with lemon curd. Finally, the lemon curd recipe as well as the Italian buttercream recipe are not my own recipes. I acquired them from when I was a student at L’Academie de Cuisine. They’re delicious, so why reinvent the wheel?

sweet-lab.com
In addition, every component of this recipe can be done in advance. It is actually recommended to do the lemon curd, raspberry coulis, and Italian meringue buttercream beforehand, because if all the recipes for all the different components are done in the same day, the entire procedure of creating this cake will seem like an overwhelming task. Frustration may take over and we don’t want that. You can also bake the cake one day in advance if you wish, but be sure to wrap it and store it properly before assembling and icing the cake so that it doesn’t dry out.

sweet-lab.com
Ingredients for Lemon Curd:
4 lemons, zest and juice
8 oz unsalted butter
12 oz sugar
4 large eggs
Procedure/Recipe for Lemon Curd:
1. Zest lemons directly into a small saucepan.
2. Strain lemons as you juice them over the same saucepan with a reamer. Push pulp down to get extra juice into saucepan.
3. Add butter to pan and bring mixture to a boil.
4. Meanwhile, crack eggs in a separate bowl. Add sugar to the eggs and whisk.
5. Temper eggs with hot lemon/butter mixture slowly.
6. Put mixture back in pot and bring to a boil while whisking continuously. Whisk for 5 minutes after mixture is brought to a boil.
7. Sieve curd into a bowl when the five minutes have passed.
8. Place bowl on top of a bowl full of ice to cool curd down.
Store in fridge for about a month, well wrapped. Store in freezer for 6-8 months.
Ingredients for Raspberry Coulis:
1 C frozen raspberries
1/8 C sugar
1 T lemon juice
Procedure/Recipe for Raspberry Coulis:
1. Place raspberries and sugar in a medium sauce pan and cook over medium heat, stirring from time to time, until mixture is brought to a simmer and sugar dissolves, about 5 minutes.
2. Add lemon juice and stir.
3. Place raspberry/sugar/lemon mixture in a blender and puree.
Freezes perfectly for several months
Ingredients for Italian Meringue Buttercream:
8 oz sugar
2 oz water
1T-2T honey (the original recipe uses corn syrup. I don’t like to use such ingredient and found that honey works just as well).
3 oz strained egg whites
10 oz butter, cubed
Procedure/Recipe for Italian Meringue Buttercream: (Please read all steps first before proceeding in order for the technique to be completely clear from start to finish).

1. Combine water and sugar in a pot. Mix water and sugar with fingers to make sugar is lump-free.
2. Heat water and sugar to 238 F (soft ball stage) and add corn syrup to water/sugar mixture as soon it looses yellow color and it becomes clear. Be sure to watch it closely and attentively.
3. Test the temperature of the sugar by numbing finger in ice-cold water, quickly dipping finger in hot water/sugar mixture, and re-dipping finger right back into cold water. Form the cooled sugar into a ball with your hands. Drop ball onto a flat surface. Sugar is ready when it makes a sound when it reaches the surface and when it doesn’t sink in while resting.

If you would rather avoid using this procedure, you can also use a candied thermometer and test the sugar until it reaches 238 F.
4. Begin to whisk egg whites at high speed when sugar has reached or is close to reaching 238 F. Decrease speed to medium after about five seconds, just after egg whites have been broken up.
5. Begin to slowly add the hot sugar to egg whites while egg whites continue to whip, meringue is soft, and yellow color is gone. Be sure to pour sugar from the side of the mixing bowl so that it doesn’t go flying everywhere. Whip meringue/238 F sugar for about 20-25 minutes until the bottom of the mixing bowl has cooled off and feels lukewarm to the touch.
6. Add pieces of butter continuously to mixture when egg whites are fluffy and stiff peaks are close to being formed. Stop whipping when buttercream looks fluffy and stiff peaks form.
Store in freezer for 6-8 months.
Ingredients for Cake:
4 oz butter
5 oz sugar
1 tsp vanilla
4 oz eggs
7 oz plain yogurt
1 oz lemon juice
8 oz cake flour
1 tsp salt
1 tsp baking powder
1/4 tsp baking soda
3 oz fresh raspberries
2 T AP flour
Procedure/Recipe for Cake:
1. Grease two 6” x 2” cake pans, base and sides.
2. Place a circular-shaped piece of parchment paper on the bottom of each cake pan.
3. Beat butter, granulated sugar, and vanilla with a mixer on medium-high speed until pale and fluffy, about 5 minutes.
4. Reduce speed to medium and incorporate eggs, one at a time and beating well after each addition.
5. Sift all dry ingredients (cake flour, baking soda, baking powder, and salt).
6. Reduce speed to low. Beat in dry mixture in 2 batches, alternating with yogurt and scraping bowl as needed.
7. Add lemon juice and continue to mix just until all ingredients are well incorporated.
8. In a small mixing bowl, mix fresh raspberries and 2 tablespoons of flour gently with your hands. Fold raspberries into cake batter.
9. Pour batter into prepared pans. Each pan should hold about 14 oz of batter. Bake at 350 F for approximately 25 minutes, or until a toothpick that is inserted into center comes out clean.
10. Let cool for 30 minutes on a wire rack. Run a knife around edges of cakes to loosen. Unmold cakes, and let cool, right side up, on rack.
Putting it all together……
1. Mix 3/4 of Italian meringue buttercream with 4.5 oz of lemon curd. Set lemon buttercream aside.
2. Mix remaining 1/4 Italian buttercream with about 1 oz of raspberry coulis. Add 1/2 C of finely chopped raspberries to buttercream. Set raspberry buttercream aside.

3. Build and assemble your cake:
a) Place the cake on a stable surface to work on comfortably. A cake turntable is recommended for icing cakes.
b) Hold serrated knife at the same level as the top part of the cake and place other hand over the top of the cake.
c) Trim dome of cake by cutting back and forth and then turning cake after each time. Continue passing knife back and forth and turning cake until the top is completely cut off.
d) Cut cake into two even layers by proceeding with same cutting procedure that was followed when trimming top and bottom off cakes. This time cut through the center of the cake to end up with 2 even cake layers.
e) Fill a pastry bag that has a #5 plain tip with lemon curd buttercream. Pipe the lemon curd buttercream into round along the edge of the cake to create a dome. This will prevent the colorful filling to leak out. Spread raspberry buttercream on the surface of first bottom layer with spatula and spread with spatula just until that filling reaches the piped lemon buttercream boarder.

f) Place second cake layer over the raspberry filling. Pipe another lemon buttercream round along the cake edge to create another dome. This will prevent the lemon curd to leak out. Spread lemon curd on the surface of second cake layer with spatula just so that filling reaches the piped boarder.

g) Place third cake layer over lemon curd filling. Pipe a third round of lemon curd buttercream along the edge of the cake to create a third dome. Spread raspberry buttercream filling on the surface of the third cake layer just so that the filling reaches the piped boarder.
h) Place fourth cake layer over raspberry buttercream.
i) Make sure layers look flat and straight. If they don’t look flat, gently push down on the cake or trim sides and/or top with serrated knife to even it out.
j) Apply crumb coat: Put a big dollop of lemon buttercream in center of cake and work icing with spatula in order to cover entire surface of cake until it reaches the edges.
k) Clean spatula and both sides. Spatula should be completely straight while spreading the icing on the sides. Turn table around while icing and get more icing when you run out.

l) Clean sides first by running spatula around cake as turning it to smoothen sides.
m) Smoothen top of cake by starting at the edge and coming straight across with spatula at a flat angle until surface is as smooth as possible.
n) Place cake in fridge and chill for about 10-15 minutes before next coating. Cake should have at least 3-4 coats, including crumb layer, with a resting period of 10-15 minutes in fridge after each coat. Repeat same procedure from steps j-n until icing has been applied 3-4 times
o) Hot knife the cake: Bring water to a boil and pour it into a tall cup/beaker. Dip spatula into hot water. Dry spatula and pass it over sides of cake and then over top as well to create smoother and cleaner surface all around. Be sure to dip spatula into hot water after every pass to remove excess icing. Dry spatula and continue passing it gently over the surface of cake to smoothen it even more. Chill cake until it becomes firm.


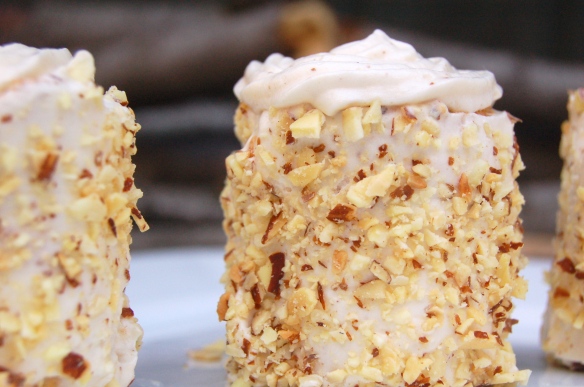
p) Place lemon curd buttercream into piping bag that has a #5 star tip, being sure not to overload pastry bag. Pipe rosettes along the boarder of the cake and one in the center. Place fresh raspberries on top of each rosette.
Pheeeew! Finally! Yes, we’re finally done! That took a little while, huh?
But what did I already tell you? Better late than never.